Tutorial
What you will build and what you need
By the end of this tutorial you will have a live WordPress site on your own domain, running over HTTPS, with sensible settings, a clean theme, a short list of essential plugins, the pages visitors and regulators expect, a working backup and a basic search setup. You will also have a checklist for launch day and a routine for the weeks after.
The tutorial follows the order in which you should do things. Each stage ends with a “check that it worked” step, so you know it is safe to continue before you build on top of it. Nothing here requires coding. Everything uses free tools that are built into WordPress or available from the official plugin and theme directories, although you may choose to pay for hosting and for a domain.
What you need before you start
- A domain name, or a decision about which to buy. If you have not chosen one, read how to pick a domain name you will not regret first.
- A payment method for hosting and the domain.
- A one-paragraph description of the site: who it is for and what they should be able to do there.
- A list of the pages you expect to need. A typical small site has a home page, an about page, a contact page and legal pages. A site with news or articles also needs a posts page.
- Your logo or a plain-text name, a few photos you have the right to use, and the text of your main pages in rough form.
- About two to three hours for the technical setup. Writing content takes longer, and that is normal.
If you are not sure what WordPress is
Read our plain-language explanation of WordPress first. It covers the difference between WordPress.org software, which you install on your own hosting, and the hosted service at WordPress.com. This tutorial is about the first kind: self-hosted WordPress that you control.
Treat the first launch as a first version. You can improve almost everything after the site is live. The goal now is a site that is safe, fast enough, accurate and reachable, not a perfect one.
How a WordPress site fits together
A short mental model prevents most beginner confusion. A WordPress site has four layers.
- Domain and DNS. The address and the records that say where the address leads.
- Hosting. A server that runs PHP, a database and a web server such as Apache or Nginx. It stores your files and answers requests.
- WordPress core. The free software that manages content, users and settings. It stores content in the database and files such as images in the uploads folder.
- Themes and plugins. A theme controls the design and layout. Plugins add features. Both are code that runs on your server.
When a visitor requests a page, the server runs PHP, WordPress reads content from the database, the theme arranges it into a page, and the result is sent to the browser. Everything that makes a site slow, insecure or broken lives in one of these four layers, so when you troubleshoot later, ask which layer the symptom belongs to.
Two things you will manage forever
Updates and backups. WordPress core, your theme and your plugins all receive updates, many of which fix security problems. Backups are your recovery plan when an update, a mistake or an attack breaks something. Both are covered in this tutorial, and each has a longer guide linked from it.
| Layer | Who maintains it | Your job |
|---|---|---|
| Domain and DNS | Registrar and DNS provider | Keep it renewed, keep records correct |
| Hosting and server software | The host (fully or partly) | Choose well, keep PHP current, watch resources |
| WordPress core | The WordPress project | Update it |
| Theme and plugins | Their developers | Choose carefully, keep few, update them |
| Content | You | Write it, keep it accurate, back it up |
Choosing hosting: the criteria that matter
Hosting is the decision beginners overthink and underinvestigate at the same time. They compare headline prices, then discover limits later. Instead, decide what you need, then compare providers against a fixed list of questions.
What WordPress itself requires
The WordPress project publishes its server requirements. At the time of writing, it recommends PHP 8.3 or newer, and either MariaDB 10.11 or newer or MySQL 8.4 or newer. It also says your host should support HTTPS, and that Apache or Nginx is the recommended web server, though any server that supports PHP and MySQL will work. WordPress can still run on PHP 7.4 and MySQL 5.5.5, but the project notes that both have reached end of life and may leave a site open to security risks. Requirements change over time, so check the current page at wordpress.org/about/requirements before you buy, and ask the host what versions it offers.
Types of hosting
| Type | What it is | Who manages the server | Best for |
|---|---|---|---|
| Shared hosting | Many sites share one server’s resources | The host | Small, low-traffic first sites on a tight budget |
| Managed WordPress hosting | A platform tuned for WordPress, often with automatic updates, caching and backups built in | The host, with WordPress-specific tooling | People who want less maintenance |
| Cloud or VPS with a control panel | A virtual server you or a panel provider configure | You or a panel service | Those comfortable with more control, or agencies |
| Self-managed VPS | A raw server | You | Experienced administrators only |
For a first site, the realistic choices are shared hosting and managed WordPress hosting. Our guides to the best WordPress hosting by use case and managed versus VPS WordPress hosting compare the categories in more depth.
Questions to ask any host
| Question | Why it matters | Where to find the answer |
|---|---|---|
| Which PHP and database versions are offered, and can I choose? | Old versions are insecure and slower | Host documentation or sales chat |
| Is HTTPS included, and does the certificate renew automatically? | Required for a trustworthy site | Plan features page |
| What backups are included, how long are they kept and can I restore them myself? | A host backup is a safety net, not a substitute for your own | Backup documentation |
| What are the resource limits (storage, memory, processes, monthly visits)? | Limits decide when you outgrow the plan | Plan details and fair-use policy |
| What is the renewal price after the introductory term? | The first term is often discounted | Pricing page, checkout summary |
| Is there a staging environment? | Lets you test changes safely | Plan features |
| How do I contact support, and when is it available? | You will need it once | Support page |
| Can I move my site out easily? | Avoids lock-in | Documentation on exports and migrations |
| Where are the servers located? | Nearer to visitors can be faster; data rules may apply | Data center list |
| Is the domain separate from the hosting account? | Keeps your address under your control | Account structure |
What not to base the decision on
- Claims of “unlimited” resources. Check the fair-use policy for what unlimited really means.
- The first-term price alone.
- Free extras you will not use, such as bundled site builders.
- A long list of features without detail on limits.
We do not publish speed measurements for specific hosts, because we have not run them ourselves. If speed matters to you, use the free tests described later in the performance stage on a trial site, or ask the host about a refund window and test during it.
Look at the provider’s real interface
Host websites show you what the control panel looks like. The screenshot below shows the public homepage of one managed hosting provider, included as an example of what a vendor page looks like, not as a recommendation. Compare several vendors on the criteria above.
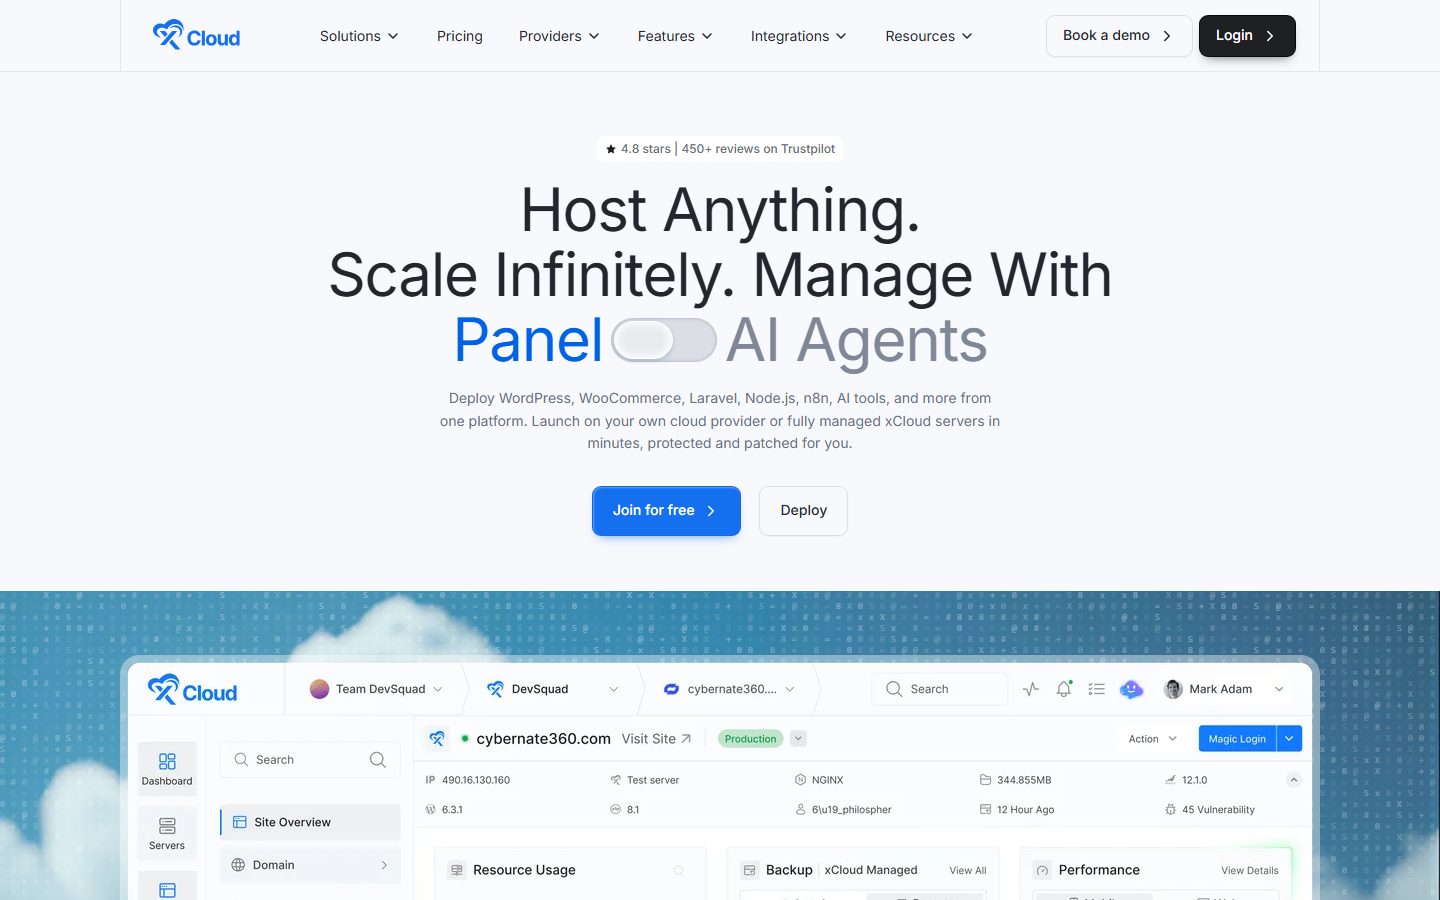
If you manage several sites, or plan to, see our xCloud WordPress hosting guide for one example of a server management approach.
Setting up the hosting account
The exact screens vary, but the stages are the same for almost every provider.
Stage 1: Sign up and secure the account
- Choose the plan and billing term you decided on. A shorter term costs more per month but leaves you free to move if the host disappoints you.
- Create the account with a unique password stored in a password manager.
- Turn on two-factor authentication in the account security settings if the provider offers it. The hosting account can reach all your files, so it deserves the same protection as your bank login.
- Save the account recovery details in your password manager.
Stage 2: Add your domain
You have two situations. If you bought the domain from the host, it may be connected automatically. If you bought it elsewhere, you connect it yourself by changing nameservers at your registrar to the host’s, or by adding the A record and other records the host gives you. Our domain tutorial explains both methods and the DNS terms in detail. The key rule is to edit DNS only at the provider that runs your active nameservers.
Stage 3: Check the domain points at the host
- Open your domain in a private browser window.
- You should see either a default page from the host or an error that mentions the host. That tells you DNS has reached the server.
- If you still see the old registrar parking page, wait for DNS caching to expire and test again. The time depends on the TTL of the record.
Stage 4: Note what you have
Create a note with the hosting login URL, the account email, the server address or IP if the host shows it, the PHP version in use, and where the control panel’s backup and file manager tools are. You will use these in later stages.
Installing WordPress
There are three common ways to install WordPress. For a beginner, the first is the best.
| Method | How it works | Pros | Cons |
|---|---|---|---|
| One-click installer in the host’s panel | The host creates the database and installs WordPress for you | Fast, fewer mistakes | Defaults may include extras you do not want |
| Pre-installed by the host | The site is ready when you sign in | Zero steps | Check what was added |
| Manual install | Download WordPress, create a database, upload files, run the installer | Full control | More steps, more places to slip up |
Method A: One-click install
- In the hosting control panel, find the WordPress installer. It may be called something like “WordPress”, “Install WordPress” or “Auto installer”.
- Choose the domain to install on, and leave the directory field blank so the site lives at the root of the domain, not in a subfolder.
- Choose the HTTPS version of your domain if offered.
- Enter a site title and an administrator username and password. Avoid the username “admin”, and use a long, unique password.
- Enter an email address you control, since WordPress uses it for administrator notices.
- Decline any extra plugins or themes the installer offers that you did not choose.
- Run the installer and wait for the confirmation.
Method B: Manual install, in outline
The WordPress developer documentation describes the classic five-minute install. In outline:
- Download the WordPress package from wordpress.org and unzip it.
- Create a database and a database user with full privileges on that database, using your host’s database tool.
- Optionally, rename
wp-config-sample.phptowp-config.phpand enter the database name, user, password and host. If you skip this, the installer asks for those details and writes the file itself. - Upload the files to the web root of your domain using SFTP or the host’s file manager.
- Open
/wp-admin/install.phpin your browser and complete the form.
The settings in wp-config.php are the database name (DB_NAME), user (DB_USER), password (DB_PASSWORD) and host (DB_HOST, usually localhost but not always), plus the authentication keys and salts. If you hit a “headers already sent” error after editing the file, the developer documentation notes that it often comes from extra text or a byte order mark before the opening PHP tag.
The setup screen
Whichever method you use, WordPress asks for the same five things: the site title, a username, a password (entered twice), an email address, and a checkbox to discourage search engines from indexing the site. All can be changed later. A sensible habit during building is to tick the search engine box while you work and untick it at launch, which is covered later. Do not forget the second part.
Check that it worked
- Open your domain in a private window. You should see the default WordPress front page.
- Open
yourdomain.com/wp-adminand sign in with the username and password you chose. - You should land on the Dashboard. If you see an installation form again, the install did not finish, so complete it.
- Check that the address bar shows a secure padlock, or that the browser does not warn about the connection. If it does not, jump ahead to the HTTPS section before you continue.
Never leave a default or guessable password on a new site, even for a day. Automated login attempts begin quickly on any public address.
A tour of the WordPress admin
The Dashboard is the front door to the admin area. Take two minutes to learn where things live, so the rest of the tutorial’s paths make sense.
The left-hand menu
- Dashboard: an overview, plus the Updates screen where you apply core, theme and plugin updates.
- Posts: dated articles, such as blog entries or news.
- Media: the library of images and files you have uploaded.
- Pages: standalone content, such as About and Contact.
- Comments: moderation of visitor comments.
- Appearance: themes, and the editor for the site’s design if your theme supports it.
- Plugins: add, activate, update and delete plugins.
- Users: accounts and roles.
- Tools: import and export, and Site Health.
- Settings: the configuration screens we cover in the next section.
Menu labels and order can change between versions, and plugins add their own entries. If a label in this tutorial is not exactly where you expect, look at the neighbouring items, or search the page of the screen you are on. We describe screens generically where we could not confirm a label.
Posts versus pages
Posts are chronological and appear in feeds, archives and categories. Pages are timeless and form the structure of the site. A brochure site might use only pages. A publication uses mostly posts. You can use both.
Site Health
Under Tools > Site Health, WordPress runs tests and groups the results into critical issues, recommended improvements and passed tests. The Info tab shows details such as the WordPress version, active theme, plugins, PHP and database versions, and whether the site uses HTTPS. Open it now and read anything flagged critical. Typical findings include an outdated PHP version, plugins waiting to be updated or a failed loopback request. We will come back to Site Health at the pre-launch stage.
First-login settings, screen by screen
Spend fifteen minutes in Settings before you add any content. Several settings are easier to get right now than to change after the site has links and traffic.
Settings > General
| Field | What it does | What to set |
|---|---|---|
| Site Title | The site’s name. Most themes show it at the top and in the browser title bar, and WordPress uses it to identify your feeds. | Your brand name |
| Tagline | A short phrase about the site. The default is empty. | A short, honest description, or leave empty |
| WordPress Address (URL) | Where the core files live | Leave unchanged, and make sure it uses https |
| Site Address (URL) | The address visitors type. Identical to the WordPress Address unless WordPress has its own directory. | Leave unchanged, and make sure it uses https |
| Administration Email Address | Receives notices such as moderation, user registration, updates and recovery mode or fatal error messages | A mailbox you read |
| Membership | “Anyone can register” lets visitors create accounts | Off, unless you run a membership site |
| New User Default Role | The role given to new accounts | Subscriber, the lowest |
| Site Language | The language of the admin dashboard | Your language |
| Timezone | Used for scheduling and displayed times | A city in your timezone |
| Date Format, Time Format | How themes display dates and times | Your regional format |
| Week Starts On | First day in calendars; the documented default is Monday | Your preference |
Two details deserve attention. First, WordPress documents that changing the Administration Email Address sends a confirmation email to the new address, and the change does not take effect until you click the link, so use an address that can receive mail. Second, the timezone matters for scheduled posts. Pick a city rather than a raw offset where you can, so daylight saving changes are handled.
Settings > Reading
- Your homepage displays: choose “Your latest posts” for a blog, or “A static page” for a business site. With a static page, you pick a Homepage page and a Posts page, and the two cannot be the same page. You need to create those pages first, so come back to this screen after the pages section below.
- Blog pages show at most: the number of posts per page of listings.
- Syndication feeds show the most recent: the number of items in your feed. For each article in a feed you can show the full text or an excerpt.
- Search engine visibility: the “Discourage search engines from indexing this site” checkbox. WordPress documents that, since version 5.3, it adds a
noindex,nofollowrobots meta tag to the page head. It also states that this asks search engines not to index the site; it does not block access, and it is up to search engines to honor it.
The search engine visibility checkbox is the most common reason a new site never appears in search results. Tick it while you build, then untick it on launch day. It is on your launch checklist later in this tutorial.
Settings > Discussion
These settings control comments and pingbacks. If your site will not use comments, switch them off now, because open comment forms attract spam.
- Untick Allow people to post comments on new articles if you do not want comments by default. You can override this per post.
- Untick Allow link notifications from other blogs (pingbacks and trackbacks) if you do not want those notifications to appear.
- If you keep comments, consider Comment author must fill out name and email, An administrator must always approve the comment or Comment author must have a previously approved comment, and Automatically close comments on articles older than a number of days that suits you.
- The comment moderation box holds a comment for review if it contains more than a set number of links. The documentation notes that the match is by substring, so a short word will match inside longer words. Use the blocklist with care, since comments matching it are deleted without warning.
- The cookies opt-in checkbox adds a consent box to the comment form before the commenter’s name, email and website are saved in a cookie, which helps with privacy compliance.
For stopping spam beyond these settings, see how to stop WordPress spam.
Settings > Media
This screen sets the sizes WordPress generates for uploaded images. The defaults are usually fine. Later, in the performance section, you will see why image size matters more than these settings.
Settings > Privacy
WordPress includes a Privacy Settings tool, introduced in version 4.9.6. Administrators can create a new Privacy Policy page, which opens a template page, or choose an existing page with the dropdown and click “Use This Page”. WordPress notes that the template includes help and suggestions, but you are responsible for providing the information your policy requires and keeping it accurate. We return to this in the legal pages section.
Users > Profile
Set your display name to something other than your login username, so your login name is not shown publicly on posts. Check that the account email is correct.
Check that it worked
- Reload each Settings screen. Your values should still be there after saving.
- Open Tools > Site Health > Info and expand the WordPress section. It lists the site language, timezone, home and site URLs, permalink structure, HTTPS status, search engine discouragement, and default comment status. Compare them with what you intended.
Permalinks: the shape of your URLs
A permalink is the permanent URL of a page, post or archive. The structure you choose here affects every address on the site, and changing it later means redirects. Set it before you publish.
The options
Go to Settings > Permalinks. WordPress documents these common settings:
| Option | Example | Notes |
|---|---|---|
| Plain | https://example.com/?p=123 | Not descriptive |
| Day and name | https://example.com/2008/03/31/sample-post/ | Includes the full date |
| Month and name | https://example.com/2008/03/sample-post/ | Includes year and month |
| Numeric | https://example.com/archives/123 | Not descriptive |
| Post name | https://example.com/sample-post/ | Short and readable |
| Custom structure | /archives/%year%/%monthnum%/%day%/%postname%/ | You build it from structure tags |
What to choose
For most new sites, Post name is the simplest and most readable. Dates in URLs make older content look outdated and make URLs longer. If you run a news site where the date is meaningful, a date-based structure can be reasonable. Our permalink structure guide goes into the trade-offs in more depth.
- Go to Settings > Permalinks.
- Choose Post name.
- Optionally set a custom Category base or Tag base. If you leave them blank, the defaults are used.
- Click Save Changes.
What can go wrong
On Apache servers, WordPress writes rewrite rules to a file called .htaccess. WordPress documents two outcomes after saving: if the file is writable you see “Permalink structure updated”, and if it is not you see a message telling you to update your .htaccess, with the rules shown below the form for you to copy in by hand. Visiting the Permalinks screen also flushes the rewrite rules, so you do not need to save just to flush them. If pages return a “not found” error after you change the structure, return to the screen, save again, and ask your host about rewrite support.
Check that it worked
Create a test page, publish it, and view it. The address should show the page’s slug, not a question-mark number. Delete the test page afterwards.
Changing the permalink structure after your site has been indexed changes every URL. If you must do it on a live site, set up redirects first. See our guide to 301 redirects.
Choosing and installing a theme
A theme controls how your site looks and what layout tools you get. WordPress documents a theme as a collection of files that together produce the design of a site without changing the underlying software.
Block themes and classic themes
A block theme uses blocks for every part of the site, including the header, navigation, content area and footer, and you edit all of it in the Site Editor. WordPress documents that block themes do not use the Customizer in the same way as classic themes. Classic themes use template files and the Customizer. For a new site, a block theme gives you the most native tooling, while a well-maintained classic theme can also work well. Our guide to block themes and the roundup of fast themes help with choices.
What to look for
| Criterion | Why it matters | How to check |
|---|---|---|
| Active maintenance | Themes need updates for security and compatibility | Last update date and changelog on its page |
| Compatibility with your WordPress version | Avoids breakage | Theme page details; test on a staging site |
| Source and review | The official directory reviews themes against its rules | Prefer themes from the official directory, or from reputable vendors |
| Weight and simplicity | Heavy themes slow the site | Look at the demo with a speed test |
| Accessibility | Visitors with disabilities must be able to use the site | Theme tags, demo with keyboard navigation |
| Responsive design | Most visitors use phones | Preview at narrow widths |
| Customization method | You should be able to edit without code | Does it use the Site Editor or the Customizer? |
| Lock-in | Switching later can break layouts if content depends on theme-specific features | Prefer standard blocks over theme-specific shortcodes |
Beware of “nulled” or pirated copies of paid themes, offered free on unofficial sites. They are a common way for malware to reach a site. Use only copies from the author or the official directory.
Install from the directory
- Go to Appearance > Themes, then select Add New.
- Search by name, or use the feature filters.
- Use Preview to see the theme demo, or Install to add it to your site.
- To add a zip file you downloaded, use the Upload Theme button.
- After installing, use Live Preview to see it with your content.
- Click Activate.
WordPress warns that if the theme preview is blank, you should not activate the theme without investigating further, and if you do not see a thumbnail at all, the theme may be corrupted or broken.
Clean up
Delete themes you will not use, except for one default theme that you keep as a fallback for troubleshooting. Inactive themes still need updates, and Site Health lists them under Inactive Themes.
Check that it worked
Open the site in a private window on your phone and your computer. The theme should load without visible errors, and the menu should open on the phone.
Starting from the Site Editor
If you chose a block theme, open Appearance > Editor (the label may differ by version) to adjust the header, footer, and styles such as fonts and colors. Make a small number of decisions: a logo, two or three colors, one or two fonts, and consistent spacing. Restraint makes a site look professional. If your site needs more advanced layouts, our page builders comparison and the advanced block editor guide are the next step, and the block editor basics tutorial covers the editing tools themselves.
Essential plugins, and how to choose them
WordPress documents plugins as PHP scripts that extend its functionality, and the plugin directory lists thousands, of varying quality. Each plugin you add is more code to update, more potential for conflict, and more attack surface. The right number for a first launch is small.
The principle: one plugin per job, only for jobs you have
Before you install, ask whether you need it now, whether WordPress already does it, and whether the plugin is maintained. Our guides on how to vet a plugin before you install it and plugins you can delete expand on this.
How to vet a plugin in five minutes
- Open its page in the directory or the vendor site.
- Check the last updated date and the “tested up to” WordPress version. WordPress itself displays a note reading “Compatible with your version of WordPress” or “Untested with your version of WordPress” on the Add Plugins screen.
- Read recent reviews and the support forum for unresolved problems.
- Check the number of active installations as a rough signal of use, not proof of quality.
- Read what data it sends to external services, in its description or privacy notes.
The short list for a new site
| Job | Do you need it at launch? | Notes |
|---|---|---|
| Backups | Yes | Covered in its own section. See our backup plugin comparison. |
| Security hardening and login protection | Yes, in some form | See security plugins compared. Your host may already provide some of this. |
| SEO | Likely | For titles, meta descriptions and sitemaps. See SEO plugins compared. Install one only. |
| Caching and performance | Maybe | Many hosts already include caching. Do not stack two caching plugins. See caching plugins compared. |
| Contact form | If you need one | See form plugins compared. |
| Email delivery (SMTP or sending service) | Often, if the site sends mail | Helps form notifications reach inboxes |
| Image optimization | Optional | You can optimize images before upload |
| Spam protection | If you keep comments or forms | See stopping spam |
Everything else can wait. Resist installing a plugin for each feature you might want one day.
How to install a plugin
WordPress documents three ways: the built-in installer, upload of a zip file, and manual upload by SFTP. The built-in installer is the easiest.
- Go to Plugins > Add New.
- Search by keyword, author or tag.
- Open the plugin’s details and read them.
- Click Install Now, then Activate.
To install a zip you downloaded, use Plugins > Add New > Upload Plugin, choose the file, click Install Now, then activate it.
How to remove a plugin
- Go to Plugins > Installed Plugins.
- Click Deactivate for the plugin.
- Click Delete.
Deactivated plugins that you leave installed still need updates, so delete the ones you do not use.
Check that it worked
After each plugin, load your front page and the admin dashboard. If something breaks, deactivate the last plugin you added. Our plugin conflict troubleshooting guide shows a systematic method.
Building your core pages
With the settings and theme in place, build the pages. Start with the minimum set, and make each one do a job.
The minimum set
| Page | Purpose | What to include |
|---|---|---|
| Home | Tell visitors what the site is and where to go next | A clear headline, a one-sentence promise, the main action, links to key pages |
| About | Build trust | Who you are, why you do this, relevant experience, a photo or logo |
| Contact | Let people reach you | A form or email address, and other ways to reach you if relevant |
| Services, Products or Blog | The core offer | Specific descriptions with the next step |
| Privacy Policy | Disclose data handling | See the legal section |
| Other legal pages as needed | Terms, cookie information | See the legal section |
Create a page
- Go to Pages > Add New.
- Type a clear title. The title becomes the URL slug, which you can edit in the page settings. Keep slugs short and lowercase.
- Add content in the editor. Use headings in order (one main heading, then subheadings), short paragraphs, and descriptive link text.
- Add images using the editor and fill in alt text that describes the image’s content for people who cannot see it. See our image SEO guide.
- Click Publish, or save as a draft if the content is not ready.
Write for the reader
- Lead with what the visitor came for.
- Use plain words and short sentences.
- Give each page one main action.
- Do not publish lorem ipsum or placeholders. Draft pages stay invisible to visitors.
- Use real contact details, and test them.
Set the homepage
If you want a static home page, return to Settings > Reading. Choose A static page, then pick your Home page for Homepage and, if you have a blog, a separate page for Posts page. WordPress documents that these cannot be the same page, and that if you leave the Homepage unselected your posts show on both. Save, and view the front of the site.
Delete the sample content
A fresh install often includes a sample post, a sample page and a sample comment. Move them to the trash and empty the trash, so they do not appear on your live site.
Check that it worked
- Visit every page in a private window while logged out. Drafts and private pages are visible only to you when logged in, so a logged-out view shows what the public sees.
- Click every link and button.
- Read each page aloud once. Errors show up when you hear them.
Menus and navigation
Navigation tells visitors where to go. Keep it short, with the most important pages first.
Principles
- Limit the main menu to about five to seven items. Fewer choices are easier to scan.
- Use words your visitors use, such as “Pricing” or “Contact”, not clever labels.
- Put the contact page or main call to action in a consistent, visible place.
- Keep legal and minor pages in the footer.
- Avoid deep dropdowns. They are hard to use on a phone.
Where to build the menu
How you edit menus depends on your theme type. With a block theme, the navigation is a block that you edit in the Site Editor or in a page, and you can add pages, links and submenus there. With a classic theme, you go to the Menus screen under Appearance, create a menu, add pages, assign it to a theme location such as Primary, and save. If you cannot find the Menus entry on a block theme, that is expected, because navigation is handled in the editor.
- Open the navigation for your theme type, as above.
- Add your Home, About, main offer and Contact pages in the order you want.
- Place the menu in the header, and a smaller menu with the legal pages in the footer.
- Save.
Check that it worked
Open the site on a phone, or resize your browser to a narrow width. The menu should collapse into a button, open, and let you reach every item. Tab through the menu with your keyboard to confirm that every item can be reached without a mouse.
Legal pages and compliance basics
This section is general information, not legal advice. Requirements depend on where you and your visitors are, what you collect and what you sell. If your site handles payments, health data, children’s data or other sensitive information, speak to a qualified professional.
Why a basic site still needs legal pages
Almost every site processes some personal data. Contact forms collect names and email addresses. Servers log IP addresses. Analytics tools set cookies. Many jurisdictions require that you tell visitors what you collect and why, and some require consent before non-essential cookies are set. Search and advertising platforms also commonly require a privacy policy.
The pages most sites need
| Page | What it covers | When you need it |
|---|---|---|
| Privacy policy | What personal data you collect, why, who receives it, how long you keep it, and how people can exercise their rights | Almost always |
| Cookie information or banner | Which cookies and similar technologies you use, and consent where required | If you use non-essential cookies, depending on region |
| Terms of use or terms and conditions | Rules for using the site or buying from it | If you sell, offer accounts or want to set rules |
| Imprint or legal notice | Identity and contact details of the operator | Required in some countries for commercial sites |
| Refund and shipping policies | How returns, delivery and cancellations work | If you sell goods or services |
| Affiliate or advertising disclosure | That you earn from links or sponsorships | If you do, and the rules of your region require it |
| Accessibility statement | Your commitment and known limits | Where law or good practice calls for it |
Create the privacy policy page with WordPress
- Go to Settings > Privacy.
- Click Create New Page to generate a Privacy Policy page from a template, or choose an existing page in the dropdown and click Use This Page.
- Read the template. WordPress states it includes help and suggestions, and that you are responsible for providing accurate information and keeping it current.
- Replace the guidance with the facts about your site: which plugins collect data, which services you use (forms, analytics, email, payments), where data is stored and who to contact.
- Publish the page.
WordPress documents that the policy page is linked from the login and registration pages. It also says that linking it from every page is your responsibility, although some themes do this for you. Add a link in your footer menu.
Make the policy match reality
The most common failure is a policy that does not match what the site does. Walk through your site and list every place data enters or leaves: forms, comments, accounts, analytics, embedded videos, fonts or scripts loaded from third parties, email sign-ups and payment providers. Your policy should mention each one. Plugin documentation often supplies suggested text for the data it handles.
Cookies and consent
If you set only strictly necessary cookies, some regions do not require a consent banner, but you should still disclose them. If you add analytics, advertising pixels or embeds that set cookies, many regions require consent before they load. A consent tool must actually block those scripts until the visitor agrees, since a banner that merely informs does not satisfy a consent requirement. Check the rules for the countries of your visitors.
Who owns what you publish
Use only images, fonts and text that you created or have a licence for. Keep a record of licences. If you use quotes or data from other sites, attribute them.
Check that it worked
- Open the privacy policy while logged out and confirm that it is published.
- Check that the footer links to it on every page.
- Compare the policy against the list of services you use. Update it whenever you add a new tool.
HTTPS and SSL
HTTPS encrypts the connection between your visitors and your server. Browsers mark sites without it as not secure, and sites need it to protect logins and forms. Most hosts now include a free certificate and renew it automatically. Confirm that yours does.
Turn it on
- In your hosting control panel, find the SSL or certificate section and issue or enable a certificate for your domain, covering both the bare domain and the www name. Some hosts do this automatically after DNS points at them.
- Make sure the certificate status shows as active, and note its renewal behaviour.
- In WordPress, go to Settings > General and check that both the WordPress Address and the Site Address begin with
https://. If the fields are locked by a constant inwp-config.php, they cannot be edited in the admin, and you or your host change them there. - Open Tools > Site Health > Info and expand the WordPress section. The question “Is this site using HTTPS?” should answer yes. WordPress made HTTPS detection and migration easier in version 5.7.
Force HTTPS everywhere
Visitors who type the old http address should be sent to the https version automatically. Many hosts provide a toggle in their control panel for this, which is the easiest route. Otherwise a redirect rule on the server or in a well-supported plugin can do the job. Test it in a private window by typing the http address.
Mixed content
Mixed content means an https page loads some resources, such as images or scripts, over plain http. Browsers may block those resources or show warnings. It most often appears when old content contains hard-coded http addresses. If you see a warning or broken images after switching, find the http references in your content and update them, using a search and replace tool that handles WordPress’s stored data safely, and make a backup first.
Check that it worked
- Load the home page, a page with images, and the contact form in a private window. The padlock should show on each, and no resource warnings appear.
- Type the http version of the address. It should redirect to https.
- Check that both the www and bare versions of the address load securely, and that one redirects to the other.
Our Cloudflare setup guide covers the additional certificate settings you must get right if you put a proxy in front of the site.
Backups: set them up before you need them
A backup is a copy of your site that you can restore if something goes wrong. The WordPress documentation on backups describes two parts of a site that you need to protect: the database, which holds posts, pages, comments and settings, and the files, which include the uploads, themes and plugins. A backup that contains only one is incomplete.
The principles
- Automatic. A backup you must remember to run will not run.
- Off-site. Keep at least one copy somewhere other than the server that hosts the site. If the server fails or is compromised, copies on it are lost too.
- Multiple versions. Keep several restore points, not just the latest, because you may notice a problem days later.
- Tested. A backup you have never restored is a hope, not a plan.
- Before changes. Take a manual backup before updating core, a theme or plugins, or changing settings.
Where backups come from
| Source | Pros | Cons |
|---|---|---|
| Host-provided backups | Automatic, no setup | Often stored with the host; retention and restore options vary; may not be accessible if the account is suspended |
| A backup plugin | You choose the schedule and the storage location | Needs configuration; uses server resources while running |
| A remote backup service | Stores copies away from the server and often handles scheduling for you | Usually a paid subscription |
| Manual export | Free and under your control | Easy to forget; needs SFTP and a database tool |
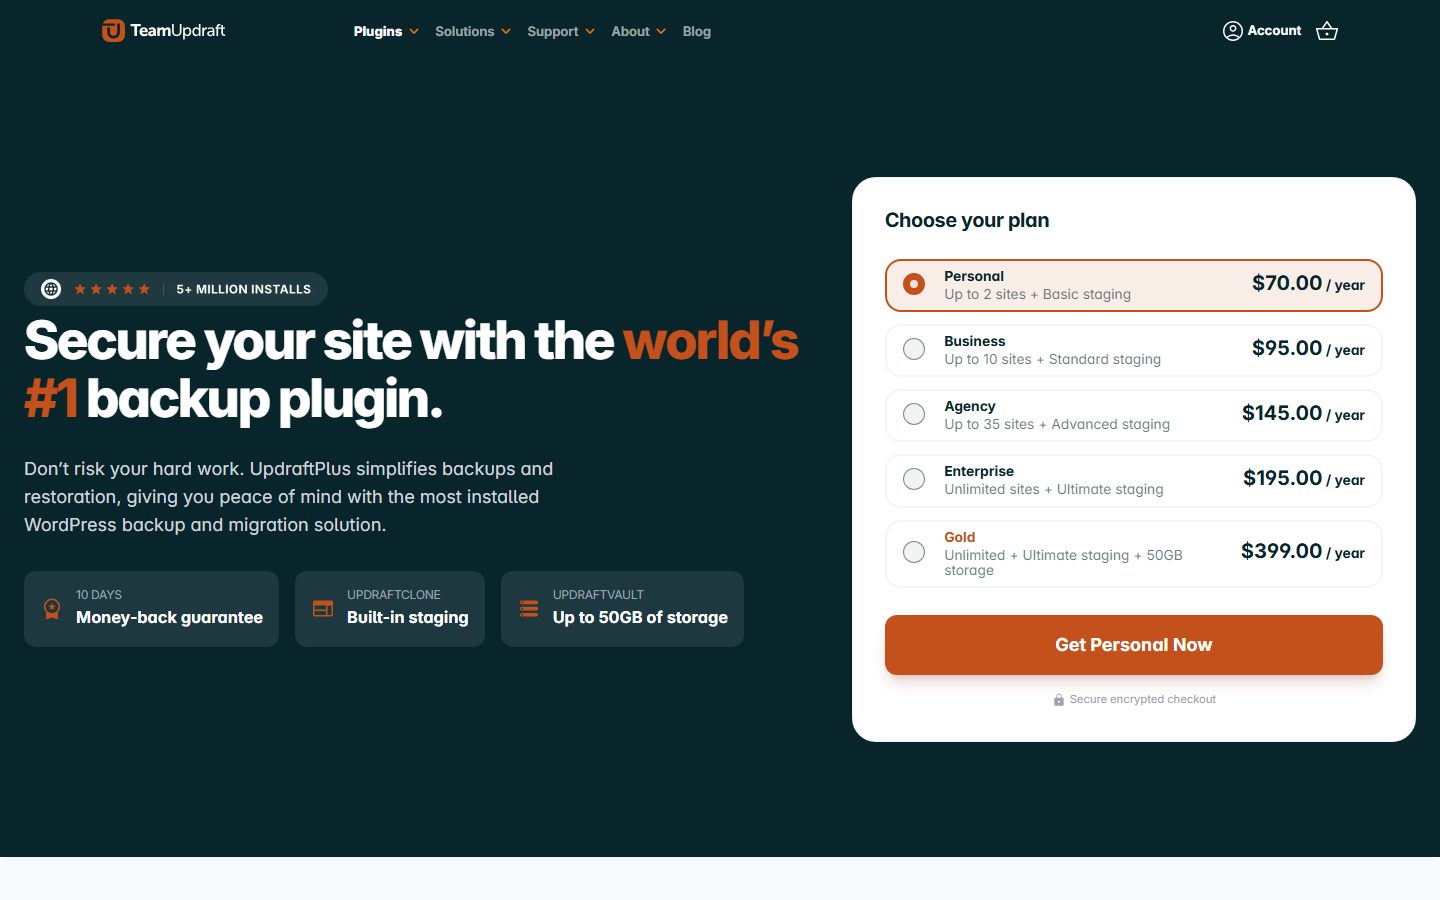
The best arrangement combines your host’s backups with one of your own that is stored off-site. Our backup plugin comparison and UpdraftPlus alternatives guide compare the options. The screenshot below shows one plugin vendor’s public page as an example of what you will look at when comparing.
Set up a backup, step by step
- Decide on the tool: a host feature, a plugin or a service. For a first site, a plugin that can send copies to a cloud storage account you control is a common choice.
- Install and activate it, as you would any plugin.
- Choose a schedule. A daily database backup and a weekly files backup is a common starting point for a site that changes often. A site that rarely changes can back up less often. Choose based on how much recent work you can afford to lose.
- Choose an off-site destination, such as a cloud storage account. Authorize it as the plugin directs.
- Choose how many copies to keep.
- Run a backup now.
Check that it worked: restore a copy
- Confirm that the backup appears in the destination you chose, and that its size is plausible rather than zero.
- Download it.
- Test a restore on a staging copy or a local test environment, never on your live site first. Our staging site guide shows how to create one.
The full routine is covered in the backup routine tutorial.
Before any update, import or major change, take a fresh backup. WordPress’s own plugin documentation says to ensure you have a current backup before updating plugins, because sometimes problems occur during the update.
Security basics
You do not need to become a security expert before launch, but you do need to close the common doors. Our WordPress security guide goes much deeper.
The launch-day security list
- Strong, unique passwords. For WordPress, the host, the domain registrar and your email. Use a password manager.
- Two-factor authentication. Enable it for WordPress administrators and for hosting and registrar accounts. See our guide to two-factor authentication.
- No default usernames. Do not use “admin”. If your install created it, create a new administrator with a different name, sign in with it, and remove the old one.
- Least privilege. Give people only the role they need. Day-to-day writing does not require an administrator. See our guide to user roles.
- Updates. Keep WordPress, themes and plugins current. WordPress introduced automatic updates for individual plugins in version 5.5, and you can toggle them on the Installed Plugins screen using the Enable auto-updates link. Weigh the convenience against the risk of an unattended update causing a problem, as described in our guide to auto-update risk.
- Few plugins and themes. Delete what you do not use.
- Trusted sources only. Do not install pirated themes or plugins.
- A security layer. A reputable security plugin or a host-level firewall can limit login attempts and block known bad traffic. Choose one, not several that overlap.
- HTTPS. Covered above.
- Backups. Covered above.
Turn off debug output
Site Health warns when the site is set to display errors to visitors or to log errors to a possibly public file, because such output can expose sensitive information. These are developer settings. Make sure they are off on a live site.
If the worst happens
Keep a link to our hacked site recovery guide. The calm way to use it is to have a clean, tested backup and fresh credentials available.
SEO basics for launch
Search engine optimization starts with a site that search engines can reach, understand and trust, and ends with content that actually helps people. At launch you only need the foundations. Our complete WordPress SEO guide and launch SEO checklist cover the rest.
Foundations
| Task | Why | How |
|---|---|---|
| Allow indexing | A site set to discourage search engines will not be indexed | Untick the box in Settings > Reading on launch day |
| Readable URLs | Clear addresses help people and search engines | Post name permalinks, set earlier |
| Unique titles and descriptions | They appear in search results | Use an SEO plugin to set them per page. See the title tags tutorial |
| Headings in order | They structure the page for readers and crawlers | One main heading, then subheadings |
| Descriptive alt text on images | Accessibility and image search | Fill in the alt text field when you add an image |
| Internal links | They help visitors and crawlers find related pages | Link between your own pages with descriptive anchor text. See our internal linking guide |
| An XML sitemap | Lists the pages you want crawled | Your SEO plugin or WordPress may provide one. See our sitemap guide |
| Search Console | Shows how Google sees the site and reports problems | See below |
Choose one SEO plugin
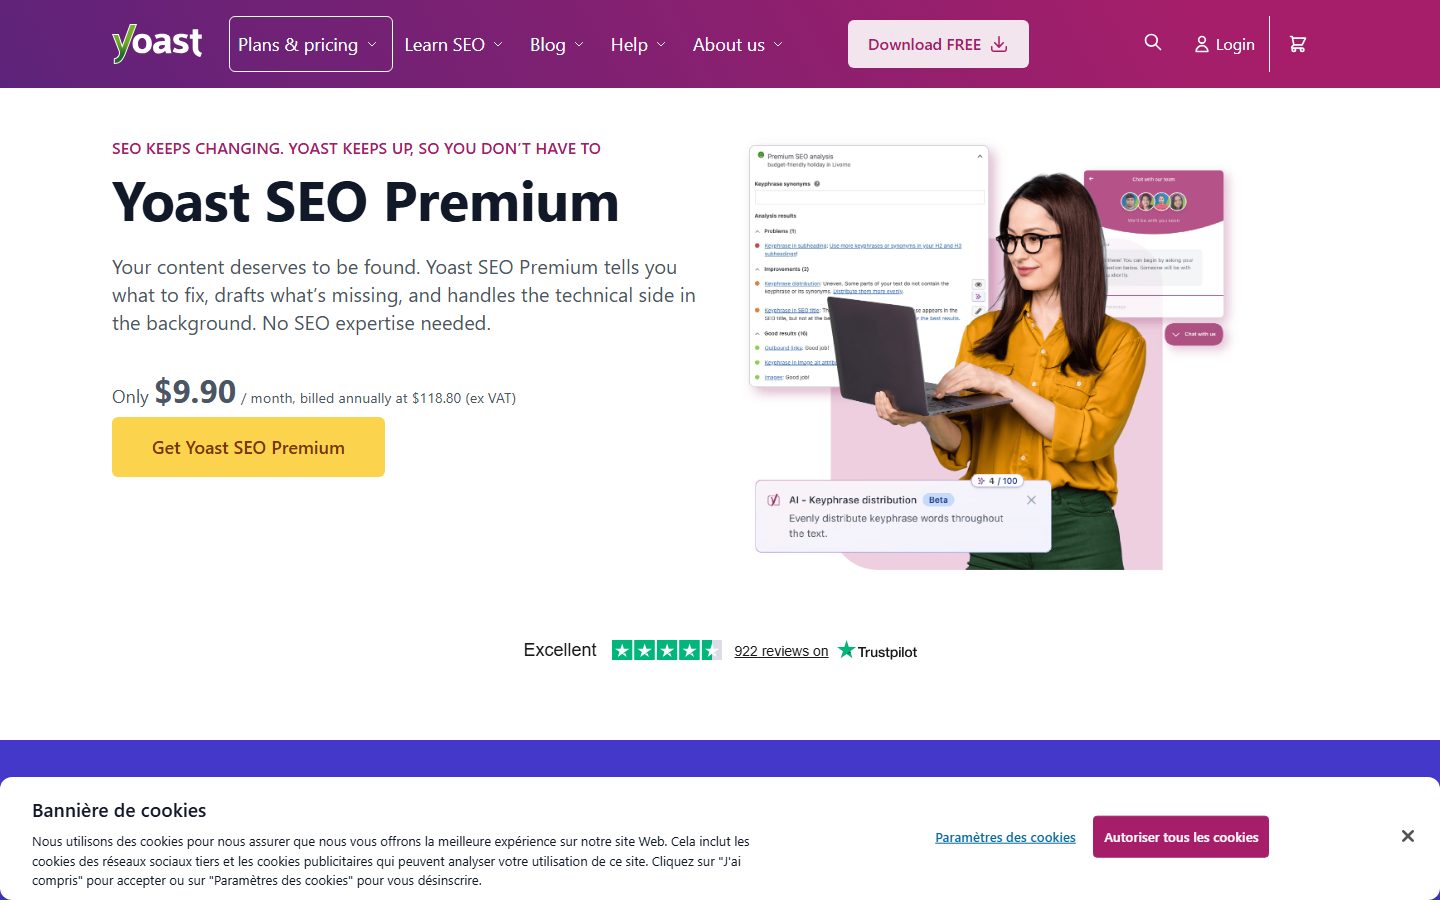
An SEO plugin gives you fields for titles and descriptions, handles sitemaps and some technical settings. Install one, not two. The screenshot below shows a vendor page for one popular option so that you know what the product looks like. It is not a recommendation over the alternatives, which our comparison and Yoast alternatives guide cover.
Set up Google Search Console
Search Console is a free tool from Google that reports which of your pages are indexed, which searches show your site, and what errors occur. Setup follows a pattern: add your site as a property, prove you own it using one of the offered methods (for instance a DNS record or an HTML tag), then submit your sitemap address. Our Search Console guide for WordPress gives the full walkthrough. Do this after you untick the discourage-indexing box.
Write for the search
Each page should answer a question someone would actually ask. Use the words your audience uses, not internal jargon. Our guide to long-tail keyword research shows how to find those words without expensive tools.
Check that it worked
- View the page source of your home page and look for the title and description you set.
- Confirm that no
noindexrobots tag is present once you have unticked the Reading setting. - Open your sitemap address in the browser and confirm it lists your pages.
Performance basics
A fast site keeps visitors and helps search visibility. For launch you do not need to chase perfect scores. You need to avoid the common slowdowns. Our WordPress speed optimization guide covers the long version, and the speed-up tutorial gives a step-by-step plan.
What Core Web Vitals measure
Google’s web.dev describes three Core Web Vitals: Largest Contentful Paint (LCP), which measures loading speed, Interaction to Next Paint (INP), which measures responsiveness, and Cumulative Layout Shift (CLS), which measures visual stability. web.dev’s published targets for a good experience are an LCP of 2.5 seconds or less, an INP of 200 milliseconds or less and a CLS of 0.1 or less, measured at the 75th percentile of page loads. Our Core Web Vitals guide for WordPress explains each one.
The launch-level wins
- Current PHP. Check the PHP version in your hosting panel and use a current supported one. See our PHP version guide.
- Light theme, few plugins. The fastest code is the code you do not load.
- Optimized images. Resize images to the size they display at before upload, compress them and consider modern formats. See our image optimization guide.
- Caching. Use the host’s cache if it has one. If you add a caching plugin, add only one. See caching plugins compared.
- Limit third-party scripts. Chat widgets, trackers and embeds add requests and can slow interaction. Add each deliberately.
- Fonts. Use few font families and weights. See self-hosting fonts.
- Lazy-load below-the-fold images. WordPress adds the loading attribute to images by default in recent versions, but verify that your largest top-of-page image is not delayed.
Measure with free tools
PageSpeed Insights is a free tool that reports field data from real users when enough exists, and lab data from a test run. A brand-new site will not have field data yet, so lab results are what you will see. Lab scores vary between runs, so run the test a few times and focus on the specific opportunities listed rather than the headline number. Our PageSpeed Insights guide explains how to read it.
Check that it worked
- Run PageSpeed Insights on your home page and one inner page, for both mobile and desktop.
- Note any specific warnings, such as oversized images, and fix the cheapest ones.
- Open the site on a real phone over mobile data, and judge how it feels.
The pre-launch checklist
Run through this list when the site is complete. Print it, or copy it into a note, and tick each item.
Content and design
- Every page is written, proofread and free of placeholder text.
- Sample posts, pages and comments are deleted.
- Images are optimized and have alt text.
- Contact details are correct and tested.
- The favicon (site icon) and logo are set.
- The site looks right on a phone, a tablet and a desktop.
Functionality
- Every link and button works.
- The contact form sends a message, and the message arrives in the inbox, not in spam.
- Menus work with a keyboard and on a phone.
- Search, if present, returns results.
- A custom 404 page or a helpful default appears for a missing address.
Technical
- WordPress, the theme and all plugins are updated.
- HTTPS works and http redirects to https. No mixed content warnings.
- Permalinks are set to the structure you want.
- Site Health shows no critical issues.
- PHP is a current supported version.
- Debug output is off.
Security and backups
- Strong unique passwords and two-factor authentication on WordPress, hosting and registrar accounts.
- No default “admin” user.
- Unused plugins and themes are deleted.
- Automatic off-site backups are running, and one restore has been tested.
Legal
- A privacy policy matches what the site does, and is linked in the footer.
- Cookie consent works if you use non-essential cookies.
- Other legal pages that apply to you are published.
Search and analytics
- Titles and descriptions are set for key pages.
- A sitemap exists.
- The privacy-respecting analytics you chose is installed, if any, and disclosed in the policy.
Email and domain
- Domain renewal is automatic and the registrant email is monitored. See the domain tutorial.
- Email on your domain works, with SPF and DKIM records set.
- The WordPress administration email address is monitored.
Launch day
If you built on the live domain, launch day is mostly flipping switches and checking. If you built on a temporary address or a staging site, you also need to move it, and our migration guide covers the move.
Steps
- Take a fresh backup and confirm that it completed.
- Update everything that has an update pending, then recheck that the site still works.
- Allow search engines. Go to Settings > Reading, untick Discourage search engines from indexing this site, and click Save Changes.
- Check the site address in Settings > General, to ensure it uses the final domain and https.
- Clear caches. Purge the caching plugin or host cache so visitors see the current version.
- Test in a private window from a phone and a desktop. Visit every main page and submit the contact form.
- Submit your sitemap in Search Console.
- Tell people. Announce the site on the channels your audience uses, and add the address to your email signature and profiles.
- Watch. Over the first day, check for error messages, form emails and anything that looks wrong on real devices.
Check that it worked
View the page source of your home page and confirm there is no noindex tag. Open Site Health and confirm that WordPress no longer reports that it is discouraging search engines. In Search Console, request indexing of your home page if the interface offers it, understanding that indexing takes time and is not guaranteed.
Do not panic about slow indexing
New sites can take days or weeks to appear in search. The first appearance is not a measure of success. Keep publishing and improving.
After launch: the first month and beyond
A site is not a poster. It needs a light routine, or it will drift into trouble. Our WordPress maintenance checklist is the full version. Start with this.
| Frequency | Task |
|---|---|
| Weekly | Apply updates after a backup, check that the site and contact form work, moderate comments |
| Monthly | Confirm backups are completing and can be restored, review Search Console for errors, review users and remove accounts that are no longer needed |
| Quarterly | Review pages for accuracy, run a speed test, delete unused plugins and themes, review the privacy policy against your tools |
| Yearly | Confirm domain, hosting and certificate renewals, review the whole site, refresh old content |
Grow the content
Publish what answers real questions, update older pages instead of abandoning them (see refreshing old content), and link new pages to related ones.
Add features only when you need them
When you want to take payments, accept bookings or sell products, evaluate the options deliberately. Our WordPress ecommerce guide and booking plugins roundup are good starting points, and the WooCommerce checklist tutorial covers a store launch.
Common mistakes and troubleshooting
| Symptom | Likely cause | Fix |
|---|---|---|
| Site never appears in search results | The discourage-indexing box is still ticked, or the site is very new | Untick it in Settings > Reading, submit the sitemap, and give it time |
| Pages return “not found” after changing permalinks | Rewrite rules were not updated | Visit Settings > Permalinks and save; check that .htaccess is writable or add the displayed rules |
| Browser shows “not secure” | No certificate, or the site address still starts with http | Issue a certificate, change the addresses to https and force a redirect |
| Padlock present but some images are blocked | Mixed content from http links | Update the http references in your content, after a backup |
| Contact form emails never arrive | The server’s mail function is unauthenticated or blocked | Use a sending service or an SMTP plugin, and add SPF and DKIM records |
| White screen or critical error after an update | A plugin or theme conflict | Restore the backup, or deactivate the last-changed plugin through the file manager by renaming its folder under wp-content/plugins |
| Cannot log in | Wrong password, a security plugin lockout, or a changed site address | Use the lost password link, wait out the lockout, or check the address settings |
| Site is slow | Large images, heavy theme, too many plugins, outdated PHP, no caching | Work down the performance list above |
| Changes do not appear | A cache is serving the old version | Purge the site cache and your browser cache |
| Admin email notices never arrive | The administration email is wrong or mail is not delivered | Check the Settings > General address and confirm the change if WordPress asked you to |
| Lots of spam comments | Comments are open with no protection | Close comments or add moderation and spam protection |
A systematic way to find a plugin conflict
WordPress’s own guidance for an unknown cause is to deactivate plugins one at a time until the problem stops. If you cannot reach the admin, rename the plugins folder through your host’s file manager or SFTP, which deactivates them all, then rename it back and reactivate one at a time. Always have a backup first.
Recap checklist
- I chose hosting using a fixed list of criteria and checked PHP and database versions.
- My domain points at the host, and I know where my DNS is managed.
- WordPress is installed, with a strong unique administrator password.
- I configured Settings General, Reading, Discussion and Privacy.
- Permalinks are set to a readable structure.
- I chose a maintained theme and deleted unused ones.
- I installed only the plugins I need, from trusted sources.
- Core pages are written, published and linked in the menu.
- Legal pages exist and match what the site actually does.
- HTTPS works everywhere with no mixed content.
- Automatic off-site backups run, and I tested a restore.
- Security basics are in place, including two-factor authentication.
- SEO foundations and Search Console are set up.
- Performance basics are done and measured.
- I unticked the search engine discouragement box on launch day.
- I have a weekly, monthly and quarterly routine.
What to do next
Your next steps depend on your goal. To learn the editor properly, work through the block editor basics tutorial. To make your backups dependable, follow the backup routine tutorial. To improve how your pages appear in search, read the title tags tutorial. To make the site faster, use the speed-up tutorial. If you plan to sell, start with the WooCommerce checklist.
If you want to speed up repetitive maintenance with AI assistants, our guides on what MCP is for WordPress and a safe staging workflow for AI agents are worth a read once your basics are solid.
FAQ
How long does it take to launch a first WordPress site?
The technical setup in this tutorial takes a few hours for most beginners. Writing quality content is the longer part and depends on how much you need. Do not set your launch date around the technical steps alone.
Do I need to know how to code?
No. Installing WordPress, choosing a theme, adding plugins and building pages are all done in the browser. Code knowledge becomes useful later if you want custom behavior, and even then, many needs are met by plugins and the block editor.
Which is better: a free theme or a paid theme?
Neither is automatically better. What matters is maintenance, quality, accessibility and fit. The official directory reviews its themes against published rules, and many sound free themes exist. A paid theme may add features and support. Judge each by the criteria in the theme section above.
How many plugins is too many?
There is no magic number. The quality and function of each plugin matter more than the count. Every plugin adds code to update and to trust, so install only what you need and remove what you do not.
Should I use a page builder?
The built-in block editor handles most sites well. A page builder can offer more design control, but adds its own learning curve, code weight and lock-in. See our page builders comparison before deciding.
Is my host’s backup enough?
It is a useful safety net, but you should also keep your own off-site copy, because host backups are usually stored with the host and their retention and restore terms vary. Test a restore either way.
What is the difference between a post and a page?
Posts are dated entries that appear in feeds and archives. Pages are standalone and are used for structure, such as About or Contact.
When should I untick “discourage search engines”?
On launch day, once the site is ready for the public. WordPress documents that the setting asks search engines not to index the site, and that it is up to them to honor it.
How do I know if my site is secure enough?
Work through the security checklist in this tutorial: strong passwords, two-factor authentication, updates, few plugins, backups and HTTPS. Check Site Health for flagged problems. For more, read the WordPress security guide.
Do I need a cookie banner?
It depends on what cookies and trackers you use and where your visitors live. Many regions require consent before non-essential cookies are set. If you use only strictly necessary cookies, you may not need a banner, but you should still disclose them. Check the rules that apply to you.
Can I change my theme later?
Yes, but design and layout can change significantly, and content that relied on theme-specific features may need rework. Test on a staging copy, and take a backup first.
Why does my site look different on my phone?
Responsive themes rearrange layouts for small screens. Check each page on a real phone, and fix anything that is cramped, cut off or hard to tap.
Should I turn on automatic updates?
For security updates, many site owners do. For major changes, it is safer to update after a backup and check the site. Read our auto-updates risk guide and decide per plugin.
What should I do if I break my site?
Do not panic. Restore your most recent backup, or deactivate the last plugin or theme change. Having a tested backup turns a disaster into an inconvenience.
Where do I go for help?
Start with the plugin or theme’s own documentation, then the WordPress support forums for that plugin or theme, then your host’s support for server issues. When you ask, include your WordPress and PHP versions, which you can copy from Tools > Site Health > Info, and the exact text of any error.
Let your AI assistant do this for you
Open the ready prompt with step‑by‑step instructions for running it through NibWP.