Tutorial
What you will build, and what you need first
By the end of this tutorial you will have a WooCommerce store that is configured in the right order: store details, products, stock, payments, shipping, taxes, checkout, emails, legal pages and a tested order flow. You will also have a launch checklist you can reuse for every store you build.
This is a configuration guide, not a design guide. Theme choice, page layout and branding are separate jobs. The goal here is the part that causes the most pain when it is rushed: the settings that decide what customers pay, what they see at checkout, how orders are taxed, and whether you get the money.
Before you start, gather the following. Having it ready saves you stopping halfway through a settings screen.
- A working WordPress site on HTTPS. If you do not have one yet, follow the launch tutorial first. It covers domain, hosting and SSL.
- A recent backup. Installing a large plugin on a live site is the moment a backup pays for itself. See the backup routine tutorial.
- Your business details: legal name, trading address, a support email on your own domain, and your VAT or sales tax registration details if you have them.
- Five to ten products with photos, descriptions, prices, weights and dimensions written down. You do not need your whole catalogue to launch.
- Your payment provider account details, or the willingness to open one. Approval can take days, so start early.
- Your shipping rules in plain words: where you ship, what you charge, and when shipping is free.
- Tax advice. WooCommerce can calculate tax. It cannot tell you what you owe. Its own documentation says exactly that, and recommends a tax professional for what and when to charge.
Before you do this, back up your site. WooCommerce adds database tables, pages and background processes. Take a full backup, and if you have a staging copy, do the first configuration there. Our guide to WordPress staging sites explains how.
Check the current requirements as well. At the time of writing, WooCommerce documentation lists WordPress 6.9 or newer, PHP 8.3 or newer (tested up to PHP 8.4), MySQL 8.0 or newer or MariaDB 10.6 or newer, HTTPS support from your host, and a WordPress memory limit of at least 256 MB. Older environments (PHP 7.4, MySQL 5.6, MariaDB 10.4) still run it, but the documentation warns that those versions have reached end of life and can expose the site to vulnerabilities. Requirements change with releases, so confirm them on the Server requirements page in the WooCommerce documentation before installing. If your host lets you pick a PHP version, our PHP version guide explains how to change it safely.
How a WooCommerce store fits together
WooCommerce is a plugin. It adds a shop to WordPress; it does not replace WordPress. That matters because many problems that look like WooCommerce problems are really theme, hosting, caching or plugin-conflict problems, and the fix lives in WordPress.
Think of the store as six layers. Each one is configured in its own place, and each one can break the layer above it.
| Layer | What it decides | Where you configure it |
|---|---|---|
| Store identity | Where you are based, where you sell, your currency | WooCommerce > Settings > General |
| Catalogue | Products, prices, stock, categories, attributes | Products in the admin menu, plus WooCommerce > Settings > Products |
| Money in | Payment methods and fees | WooCommerce > Settings > Payments |
| Delivery | Zones, methods, classes, rates | WooCommerce > Settings > Shipping |
| Tax | Rates, price display, which address counts | WooCommerce > Settings > Tax |
| Communication | Order emails, account pages, legal pages | WooCommerce > Settings > Emails, Accounts & Privacy, Advanced |
The order matters. A product price means little until you know whether prices include tax. A shipping rate means little until you know which zones you serve. A payment test means little until the cart and checkout pages work. This tutorial follows that dependency order.
A few terms you will meet repeatedly:
- Simple product. One item, one price, no options.
- Variable product. One product with options such as size or colour. Each combination is a variation with its own price, SKU and stock.
- Attribute. A property such as Size or Colour. Attributes can be global (shared across products) or specific to one product.
- SKU. A stock keeping unit: your own unique code for a product or variation.
- Shipping zone. A set of regions that share the same shipping methods and prices.
- Shipping class. A label that groups similar products so a shipping method can charge them differently.
- Tax class. A group of tax rates, such as standard or reduced.
- Gateway. The plugin that connects checkout to a payment provider.
- SCA. Strong Customer Authentication, a European rule for card payments, covered in the payments section.
Installing WooCommerce and running the setup wizard
Install from the official directory so you get the real plugin and automatic updates.
- Open Plugins > Add New Plugin in the admin menu.
- Search for WooCommerce. Check the author is Automattic and the listing shows a very large number of active installations. Imitations exist, and our guide on vetting a plugin before you install it lists what to check.
- Select Install Now, then Activate.
- WooCommerce opens its onboarding wizard immediately after activation.
The wizard, screen by screen
According to the WooCommerce documentation, the onboarding flow runs through these steps. Wording shifts between versions, so treat the labels as a guide rather than a script.
- Welcome to Woo! Choose Set up my store for guided setup, or Skip guided setup to go straight to the checklist.
- Which one of these best describes you? Pick the option that fits: starting a business, already selling, or setting up a store for a client.
- Tell us a bit about your store. Enter the store name, the type of products or services you plan to sell, the store location, and a store email address.
- Free features. WooCommerce may recommend free features for payments, shipping, tax, marketing and security, based on your answers. You can keep them, clear any you do not want, or skip the step.
- Jetpack connection. This step appears only if you picked optional features that use a WordPress.com connection through Jetpack. If you skip those features you may not see it.
- Let’s roll. The wizard ends and opens the WooCommerce Home screen with a setup checklist.
You can skip anything optional. Every answer is editable later under the WooCommerce settings. Be careful with the recommended free features in particular: each one installs another plugin, and every extra plugin is something to update, secure and, eventually, debug. Install only what you have a use for today. Our list of plugins you can probably delete makes the same point from the other direction.
The setup checklist
After onboarding, WooCommerce Home shows a task list. Per the documentation, the tasks are, in order:
- Add your products. Opens a product type picker or a CSV import.
- Set up payments. Opens WooCommerce > Settings > Payments. Available providers depend on your country.
- Customize your store. Opens a simplified design screen to use the site editor or browse themes.
- Collect sales tax. Choose an automated tax partner, set up taxes manually, or say you do not charge sales tax.
- Select your shipping options. Appears only when WooCommerce needs location details. Covers store location, destinations, zones and methods.
- Launch your store. Lets you preview the store, review essential tasks and turn off Coming soon mode.
The checklist is a good prompt, but it is shallow. It gets you a store that technically works. The rest of this tutorial covers what the checklist glosses over.
If you dismissed the wizard or the checklist, you can bring it back. Go to a supported admin page such as WooCommerce > Status, open the Help menu and select Setup wizard.
Check that it worked
- A WooCommerce item and a Products item appear in the admin menu.
- Under Pages, you can find Shop, Cart, Checkout and My Account. The documentation says the wizard creates these, plus a draft refund and returns policy.
- If a default page is missing, go to WooCommerce > Status > Tools and use Create pages.
- New stores that finish onboarding start in Coming soon mode, so logged-out visitors see a landing page instead of your half-built shop. That is what you want for now.
Store details: location, currency and where you sell
Open WooCommerce > Settings > General. The documentation describes this tab as covering your store location, where you sell and ship orders, the default customer location, whether taxes and coupons are enabled, and currency options. Getting these right first prevents confusing tax and shipping behaviour later.
| Setting area | What to decide | Why it matters |
|---|---|---|
| Store address | The real country, state and postcode you trade from | Used as the "shop base" for tax and as the origin for shipping |
| Selling location(s) | Which countries you accept orders from | Customers outside this list cannot check out |
| Shipping location(s) | Which countries you ship to | Limits the destinations available when you build shipping zones |
| Default customer location | What WooCommerce assumes before a customer enters an address | Affects the tax and shipping shown early in the journey |
| Enable taxes | Whether tax calculation is on | The Tax settings tab only appears once this is enabled |
| Currency options | Currency, symbol position, separators, decimals | Controls how every price is displayed |
- Go to WooCommerce > Settings > General.
- Enter your real store address.
- Set the selling and shipping locations to the countries you can genuinely serve. Start narrow. It is much easier to add Germany next month than to untangle a refund for an order you cannot ship to Brazil.
- Choose your currency and check the formatting options match local convention.
- Under Taxes and coupons, tick Enable tax rates and calculations if you need to charge tax. Leave coupons enabled if you plan to run discount codes.
- Select Save changes.
Selling and shipping locations are set at the store level; shipping zones (later) are the finer layer. The shipping zones documentation tells you to check your Shipping location(s) setting before you build zones, so if a zone region is mysteriously unavailable, this is the first place to look.
Pick one currency to start. WooCommerce core uses one store currency. Selling in several currencies needs an additional plugin. Add that complexity after your first orders, not before.
Check that it worked
- After saving, a Tax tab appears among the settings tabs, if you enabled taxes.
- Add a test product later and confirm the price shows your currency symbol in the format you chose.
The product catalogue: simple products done properly
You can create a product with only a name and a price. The WooCommerce documentation says so directly, and also notes that fuller listings are more appealing and perform better in search. Before you start entering products, decide on categories, tax treatment, stock tracking, shipping weight and dimensions, whether there are variations, and whether reviews are allowed.
Choose the right product type
| Type | Use it when | Notes |
|---|---|---|
| Simple | One item with no options | Needs a name, price and description. Images and attributes optional |
| Variable | The same product comes in sizes, colours or similar | Each variation has its own price, SKU and stock |
| Grouped | You want several related products on one page | Each can be added to the cart individually |
| External/Affiliate | The product is sold on another website | Requires a product URL and button text |
| Virtual | A service, membership or anything that does not ship | Skips shipping fields |
| Downloadable | A digital file delivered after payment | Can be combined with other types |
Selling files, courses or licences is a different shape of store. Our guide to selling digital products on WordPress covers what changes.
Add a simple product
- Go to Products > Add New Product.
- Enter the product name. Write it the way customers search for it, not the way your warehouse labels it.
- Write the description and short description. Put the facts a buyer needs: materials, dimensions, what is included, care instructions, compatibility. The short description appears near the price, so lead with the benefit and the key spec.
- In the Product data box, leave the type as Simple product.
- On the General tab, enter the Regular price. Add a Sale price only if you are running a sale. Select Schedule to set Sale price dates From and To. Per the documentation, a sale ends at 11:59 pm on the To date.
- Set Tax status to Taxable, Shipping only or None, and Tax class (default Standard). Leave these at their defaults until the tax section tells you otherwise.
- Add the product image, a gallery of further images, and a category.
- Select Publish.
On image quality: product photography drives conversion more than most settings, but heavy images slow every page. Resize before upload and use modern formats. Our image optimisation guide explains WebP and AVIF, and the image SEO guide covers file names and alt text for product shots.
Write descriptions that sell and that search engines can read
Do not paste the manufacturer description. If a hundred stores publish the same paragraph, yours has no reason to rank and no reason to convince. Write for the buyer’s actual questions: Will it fit? How long does it last? What happens if it does not work? Our article on product page conversion goes further into layout and trust signals.
Categories, attributes and units
- Categories are the main navigation structure. Create a small, logical tree. Avoid putting one product in six categories.
- Units of measurement for weight and dimensions are set in WooCommerce > Settings > Products > General, according to the documentation. Set them before you enter weights, otherwise your shipping calculations will be wrong in a hard-to-notice way.
- Shop page. The page used as your main shop is assigned under WooCommerce > Settings > Products. The documentation warns that if its slug is not
shop, the/shop/URL will return a 404. - Reviews. Review settings also live under the Products settings. Decide whether to allow them and whether only verified owners may review.
Check that it worked
- View the product page logged out (or in a private window). Price, image, description and Add to cart button all show.
- Add it to the cart and confirm the line shows the right price in the right currency.
Variable products: sizes, colours and other options
Use a variable product when customers choose between versions of the same item. Each variation gets its own price, SKU, stock and shipping details, so it is far better than creating five separate products for five sizes.
- Go to Products > Add New Product and enter a name.
- In Product data, choose Variable product.
- Open the Attributes tab. Either pick an existing global attribute and choose its values (use Select All or individual values), or select Add New to create an attribute just for this product. For a custom attribute, name it and enter values separated by a pipe character, such as
Small | Medium | Large. - Select Save Attributes. Drag attributes into the order you want shoppers to see before saving.
- Open the Variations tab. Select Generate variations to create every combination, or Add manually to create only the ones you stock.
- Expand each variation and set its price, stock status, weight, dimensions and shipping class.
- Optionally use the Bulk actions dropdown at the top of the Variations tab to apply a setting, such as a price, to all variations at once.
- Select Save changes at the bottom of the Variations panel.
- Set a default variation if you want one preselected. It becomes available once you have created at least one variation.
- Select Publish.
The product editor documentation adds one rule worth remembering: an attribute must have Used for variations checked in the Attributes section before it can drive variations. If an attribute does not appear in the Variations tab, check that setting first.
Global versus custom attributes
| Approach | Good for | Trade-off |
|---|---|---|
| Global attribute | Values shared across many products: Size, Colour, Material | Reusable, filterable in the shop, but you manage a central list |
| Custom, per-product attribute | A one-off option on a single product | Fast to set up, but not reusable or easy to filter by |
If you plan to offer shoppers filters (show me everything in blue), use global attributes from the start. Converting dozens of custom attributes later is tedious.
Common variation mistakes
- Leaving the price blank on a variation. That variation cannot be bought. Fill every price, or use bulk actions.
- Generating combinations you do not stock. Three sizes and five colours is fifteen variations. Delete the ones that do not exist, or they will look purchasable.
- Setting stock on the parent only. The documentation notes that, on a variable product, parent-level stock covers all variations combined. Manage stock per variation if sizes sell at different rates.
- Forgetting per-variation weight. A large size that weighs more needs its own weight if you use weight-based shipping.
Check that it worked
- On the live product page, choosing each option updates the price and image as you expect.
- An out-of-stock variation shows as unavailable instead of adding to the cart.
Inventory and stock management
Stock settings stop you selling what you do not have. They also generate the emails that tell you when to reorder. There are two levels: store-wide defaults in WooCommerce > Settings > Products (the Inventory area) and per-product fields on the Inventory tab of the product editor.
Per the product editor documentation, the stock-related fields appear only if stock management is enabled in the Inventory settings. Here is how the product-level fields behave.
| Field | When it appears | What it does |
|---|---|---|
| SKU | Always | An optional identifier. It must be unique across your store |
| Manage stock (checkbox) | If stock management is enabled store-wide | When ticked, you control stock with a quantity. When unticked, you set a status by hand |
| Stock status | When Manage stock is off | In stock, Out of stock, or On backorder |
| Quantity | When Manage stock is on | WooCommerce marks the product out of stock when it reaches zero |
| Allow backorders? | When Manage stock is on | Do not allow; Allow, but notify customer; or Allow |
| Low stock threshold | When Manage stock is on | The level that triggers a low stock email to the store manager. Defaults to the store-wide level and can be overridden per product or variation |
| Sold individually | Always | Limits each order to one of the item. Customers can still place separate orders |
Decide your stock policy before you enter numbers
- Do you hold physical stock? If yes, turn on stock management and track quantities. If you make to order or sell services, leave it off and use stock status.
- Will you accept backorders? Allowing them keeps sales flowing but sets a promise you must keep. If you allow them, choose the option that notifies the customer so they know about the delay.
- Who gets low stock alerts? The documentation says the low stock email goes to the store manager. Check the recipient address in the inventory settings, and make sure it is a mailbox someone reads.
- What about unique items? One-off pieces, such as art or second-hand goods, are a good use of Sold individually.
SKUs that will still make sense in two years
A SKU is for you, not the customer. Make it short, unique and structured, for example a category code, a product code and a size code. Avoid reusing codes after you discontinue a product. WooCommerce will reject a duplicate SKU, which is helpful, but it will not warn you that your scheme has stopped being readable.
Check that it worked
- Set a product quantity to 1 and buy it in a test order. The product should switch to out of stock.
- Check that the low stock threshold fires the email you expect at the level you set. Testing orders comes later in this tutorial.
Payments: choosing a gateway and meeting SCA
Open WooCommerce > Settings > Payments. The providers offered depend on your country and store details, which is why the list varies between stores. Pick one primary method for launch, then add alternatives.
The common choices are card payments through a provider such as Stripe, Square or Mollie, plus wallets and local methods that the provider enables. Our comparison of the best WooCommerce payment gateways goes deeper on fees and regional availability. Fees and availability change, so check each provider’s pricing page rather than relying on an article, including this one.
How to choose
| Question | Why it matters |
|---|---|
| Which countries does the provider support for your business? | Provider availability depends on where your business is registered. Check before you build around one |
| Which payment methods do your customers expect? | Cards everywhere; local methods such as bank redirects matter in specific countries |
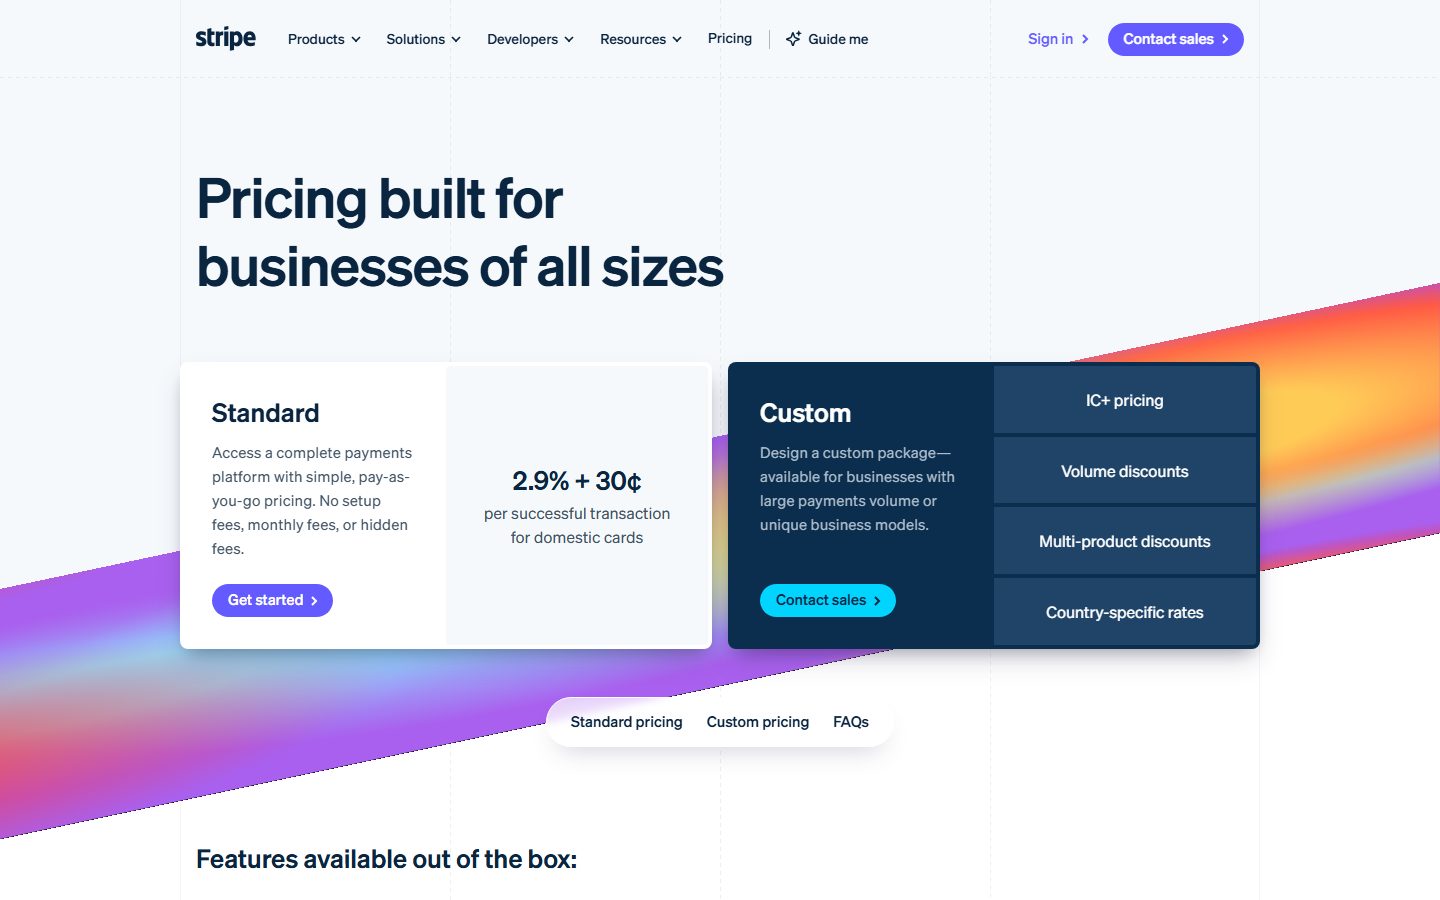
| What are the fees? | Usually a percentage plus a fixed amount per transaction, but it varies by country, card type and method |
| How long until money reaches you? | Payout schedules vary by provider and account age |
| What happens in a dispute? | Understand the chargeback process and fees before you take your first order |
| Does it support your product type? | Subscriptions and digital goods have extra requirements |
Mollie and Square are other providers you will see offered in some countries. Read each provider’s own pages for supported countries, methods and fees, and confirm availability for your business before you commit.
Connect Stripe: the general path
The WooCommerce documentation for the Stripe extension is an index of linked guides. It covers connecting to a Stripe account, setting up webhooks, adjusting settings, enabling payment methods (cards, express checkouts, local methods and buy now, pay later options), configuring express checkouts including Apple Pay, testing, and 3D Secure. The page also carries a security notice telling store owners to update to a patched version, so check your installed version under Plugins > Installed Plugins even if automatic updates are on.
- Install and activate the Stripe extension for WooCommerce from the official plugin directory or WooCommerce.com, and update it to the latest version.
- Open WooCommerce > Settings > Payments and follow the connect flow for Stripe. You will log in to your Stripe account and authorise the connection.
- Enable the payment methods you actually want. Each extra method adds a choice at checkout. Start with cards and any express wallet your customers use.
- Set up webhooks as the guide for your version instructs. Webhooks let Stripe tell your store about asynchronous events, such as a payment that completes after a redirect, so a missing or broken webhook can leave orders stuck in the wrong status.
- Keep the gateway in test mode until the testing section of this tutorial is done.
Test mode
WooCommerce documentation for testing its card payments describes the flow like this: go to Payments > Settings, tick Enable test mode, confirm in the popup, and save. In test mode you can place orders with test cards, with no real fees charged. The test order then appears under WooCommerce > Orders, and the transaction under Payments > Transactions in setups that provide that screen. The exact menu location depends on the gateway and version you use, so follow the settings screen you actually see.
Use any future expiry date and any three-digit CVC (four digits for American Express). Stripe publishes its test numbers in its own documentation:
| Scenario | Test card |
|---|---|
| Successful Visa payment | 4242 4242 4242 4242 |
| Generic decline | 4000 0000 0000 0002 |
| Insufficient funds | 4000 0000 0000 9995 |
| 3D Secure always required | 4000 0027 6000 3184 |
| 3D Secure required, then succeeds (US-issued) | 4000 0084 0000 0027 |
| 3D Secure required, declined after authentication | 4000 0084 0000 1629 |
Only use test numbers with test keys or test mode. Never type real card details into a test checkout, and never use test numbers on a live gateway expecting a real result.
What SCA means for you
Strong Customer Authentication is a rule that came into effect on 14 September 2019 as part of the PSD2 regulation in Europe. Stripe’s documentation says card payments must use 3D Secure to meet it, and that banks may decline transactions that do not follow the authentication guidelines.
It affects you if all of the following apply, per Stripe: your business is based in the European Economic Area (or creates payments for connected accounts there), you serve customers in the EEA, and you accept cards. Even if you mostly process low-risk transactions that may be exempt, Stripe advises updating your integration so customers can complete authentication when the bank asks for it.
The practical advice for a WooCommerce store is short:
- Use a current, maintained gateway extension that supports 3D Secure. Integrations that rely on the legacy Charges API, Stripe warns, may see high decline rates from banks that enforce SCA.
- Test the authentication flow with 3D Secure test cards, covering both success and failure.
- If you sell subscriptions or saved-card repeat payments, read the gateway’s guidance on off-session payments, because those can require a customer to authenticate again. Our guide to recurring billing on WordPress covers that shape of store.
- Consider the liability point. Stripe notes that when a payment is authenticated through 3D Secure and the cardholder later disputes it as fraudulent, liability typically shifts to the card issuer. If an exemption was applied and no authentication occurred, that shift does not apply.
Ask your provider, not a blog, whether your specific setup meets SCA. Stripe itself tells businesses using a third-party plugin to contact their partner to confirm.
Check that it worked
- The gateway shows as connected with no warnings in the Payments screen.
- A test order with
4242 4242 4242 4242creates an order in WooCommerce > Orders. - The 3D Secure card opens an authentication step and the order completes after you approve it.
- A declined card shows a clear error at checkout and creates no paid order.
Shipping: zones, methods and classes
Shipping settings live under WooCommerce > Settings > Shipping. There are three building blocks: zones (where), methods (how), and classes (what kind of product). Learn them in that order.
Shipping zones
Before you build zones, check Shipping location(s) in WooCommerce > Settings > General, as the documentation instructs.
- Go to WooCommerce > Settings > Shipping > Shipping zones.
- Select Add zone.
- Enter a Zone name, such as "Domestic" or "EU".
- Choose Zone regions. A region can be a country, a state or province, or a continent.
- Optional: select Limit to specific zip/postcodes and enter one code per line. You can use exact codes, numeric ranges such as
90210...99000, or wildcards such as902*. Wildcards do not work within numeric ranges. - Add shipping methods to the zone (next section).
- Select Save changes.
Zone order matters. Per the documentation, zones are matched from the top of the list down and the first match is used. Order them from the smallest region to the largest, for example a city, then a state, then a country. In recent versions (the documentation names WooCommerce 11.1), the zones table shows a warning when a broader zone above already covers a narrower zone’s region. To reorder, drag the handle and select Save changes.
Locations not covered
The Rest of the world zone catches any address that matches no other zone. Adding methods to it is optional. Per the documentation, if a customer’s address falls in a zone with no methods, they are told no shipping is available. If you want to exclude a specific region while keeping Rest of the world available, add a zone for that region and give it no methods. Rest of the world cannot be moved, renamed or deleted.
Shipping methods
The built-in methods are Flat Rate, Free Shipping and Local Pickup. Anything else comes from an extension or custom code.
- Go to WooCommerce > Settings > Shipping > Shipping zones and select Edit on a zone.
- Select Add shipping method at the bottom.
- Choose the method and select Continue.
- Configure it, then Save changes.
The default selected method is the first enabled method in the matched zone, so order methods with your preferred option on top. To disable a method without deleting it, use the Enabled toggle; to remove it, use Delete.
| Method | Best for | Key settings |
|---|---|---|
| Flat Rate | A fixed price per order, per item or per class | Name, Tax Status, Cost, per-class costs, calculation type |
| Free Shipping | Promotions or free shipping over a threshold | Free Shipping Requires and a minimum order amount or coupon |
| Local Pickup | Customers collect from you | Documented separately for classic and block checkouts |
Flat Rate in detail
Per the documentation, a Flat Rate method has a Name (what customers see in the cart and at checkout), a Tax Status (whether tax applies to the cost), and a Cost (the base charge for the whole cart). Setting the cost to zero turns off the base flat rate, which is useful when you charge only by shipping class.
Advanced costs use formulas. The documented placeholders are:
[qty]: the number of products in the cart. For example,10 + ( 2 * [qty] )costs 12 for one item and 14 for two.[fee percent="10"]: a percentage of the product total. For example,10 + [fee percent="10"]on a 20 order costs 12.min_feeandmax_fee: optional floor and ceiling for the percentage fee, as in10 + [fee percent="10" min_fee="4"].
Free Shipping options
The Free Shipping Requires setting offers: No requirement, A valid free shipping coupon, A minimum order amount, A minimum order amount OR a coupon, and A minimum order amount AND a coupon. For the coupon option, create the coupon under Marketing > Coupons and enable Allow free shipping. When a minimum order option is chosen, a checkbox, Apply minimum order rule before coupon discount, controls whether the pre-discount or discounted total is tested. Unticked, a 30 order with a 10 coupon counts as 20; ticked, it counts as 30.
A free shipping threshold is a well-known way to lift order values, but you must make sure the margin still works at the threshold. Our checkout article on optimising checkout discusses how shipping cost surprises drive abandoned carts.
Shipping classes
Classes group products so a method can charge them differently. They set no prices by themselves. Customers never see them.
- Go to WooCommerce > Settings > Shipping > Classes.
- Select Add shipping class.
- Enter a Shipping Class name (for example Heavy), an optional Slug, and an optional Description.
- Select Create, then Save.
Assign a class on the product’s Shipping tab using the Shipping class dropdown. For variable products, set it on the parent, and override it per variation if one version is bulkier. A product can have only one class. To assign many at once, go to Products > All Products, tick the products, choose Edit in the Bulk actions dropdown, select Apply, choose the class, then Update.
Once classes exist, each Flat Rate method shows a cost field per class, plus a "no shipping class cost" field for products without one. These amounts are added on top of the base cost. The Calculation type controls how they combine:
| Calculation type | Behaviour | Documented example |
|---|---|---|
| Per Class | Charges each class present in the cart separately | 0 base + Heavy 10 + Small 1 = 11 |
| Per Order | Charges only the most expensive class present | 0 base + Heavy 10 (most expensive) = 10 |
Set your shipping up from the buyer’s side
- List your regions and group them by identical pricing. Each group is a zone.
- Decide if weight, item count or product type changes the price. If product type, create classes. If weight, plan for a weight-based extension, because core Flat Rate does not price by weight on its own.
- Decide the free shipping rule and confirm the margin.
- Write the delivery times and returns terms where customers will see them: product pages, the shipping policy and the checkout.
If you need carrier-calculated live rates or printed labels, the WooCommerce documentation points to separate extensions for specific carriers. Our shipping setup guide compares options.
Check that it worked
- Add a product to the cart and use the Calculate Shipping link on the cart page. The methods from the matching zone should appear.
- Test an address in each zone and one in no zone. The last case should show the Rest of the world result or a "no shipping available" message, as you intended.
- Test a cart that mixes shipping classes and check the total matches your hand calculation.
Taxes: configure carefully, confirm with a professional
The WooCommerce documentation is explicit that its tax pages cover software configuration only. For what to charge and when, consult a tax professional. Treat everything here as a map of the settings, not tax advice.
Turn taxes on
- Go to WooCommerce > Settings > General.
- Under Taxes and coupons, tick Enable tax rates and calculations.
- Select Save changes. A Tax tab now appears.
Automated or manual taxes
The setup checklist lets you choose an automated tax partner, set taxes up manually, or say you do not charge sales tax. In the Tax settings, an Enable automated taxes option hands calculation to the WooCommerce Tax extension. If core tax fields are greyed out, that option is probably on. Switch to Disable automated taxes and save to use the manual settings. A panel of recommended tax solutions may appear on the main Tax screen; per the documentation it only suggests extensions and does not determine your obligations.
The core tax options
| Option | Choices | Notes |
|---|---|---|
| Prices entered with tax | Yes, I will enter prices inclusive of tax / No, I will enter prices exclusive of tax | Decide this before entering products. The documentation’s UK example splits a 9.99 inclusive price at 20% into 8.325 base and 1.665 tax |
| Calculate tax based on | Customer shipping address (default), Customer billing address, Shop base address | The first two need the customer to enter that address |
| Shipping tax class | Shipping tax class based on cart items (default), Standard, Reduced rate, Zero rate, or your custom classes | If no product uses the Standard rate, WooCommerce uses the first rate under Additional tax classes |
| Rounding | Round tax at subtotal level, instead of rounding per line | Changes how totals add up |
| Additional tax classes | One class per line | Standard rates always exists and cannot be removed. Saved classes become subtabs |
| Display prices in the shop | Including tax / Excluding tax | What shoppers see on product and shop pages |
| Display prices during cart and checkout | Including tax / Excluding tax | Often matches the shop setting for consumer stores |
| Price display suffix | Free text with {price_including_tax} and {price_excluding_tax} | Useful for notes such as "incl. VAT" |
| Display tax totals | Itemized / As a single total | Itemized shows each rate’s name; single shows one Tax line |
If the three display-related settings conflict, a warning appears. Select Use recommended settings to align them with your Prices entered with tax choice.
Add manual tax rates
Each tax class has a rates table. The columns, per the documentation, are Country code, State code, Postcode/ZIP, City, Rate %, Tax name, Priority, Compound and Shipping.
- Open WooCommerce > Settings > Tax and choose the class subtab, such as Standard rates.
- Select Insert row.
- Enter the country code, optional state, postcode and city, the rate percentage and a tax name such as VAT or GST.
- Tick Shipping if the tax applies to shipping.
- Select Save changes.
A few rules from the documentation matter for accuracy. Postcode values are separated with semicolons, and wildcards (*) and numeric ranges are supported. Priority works per level: WooCommerce uses only the first matching rate at each priority level, and lower numbers are considered first. Use different priorities when more than one tax stacks, and use Compound only when your jurisdiction applies tax on top of another tax. You can Import CSV and Export CSV rates; exporting one hand-entered rate gives you a template. To remove rates, select rows, choose Remove selected row(s) and save. Deleting all rates is possible under WooCommerce > Status > Tools > Delete tax rates and cannot be undone.
Region-specific details are covered in our EU and US tax setup guide. Tax data shows up under WooCommerce > Analytics > Taxes.
Common tax mistakes
- Changing Prices entered with tax after entering many products. Prices do not magically recalculate in the way you want. Decide first.
- Selling to customers in a place where you have obligations but no rate set. The cart shows no tax and you under-collect.
- Assuming the shop base address is enough. If you tax by the customer’s address, test addresses outside your base.
- Showing prices without tax to consumers in regions where consumers expect to see the final price.
Check that it worked
- Add a taxable product to the cart as a customer in a taxed region. The tax line should show the rate and amount you expect.
- Repeat for a customer outside any rate. No tax should apply, if that is correct for you.
- Compare prices on the shop page, cart and checkout. Inclusive or exclusive display should be consistent with your decision.
Checkout, accounts and the pages that make it work
WooCommerce needs a handful of pages to be assigned correctly. The documentation says Cart and Checkout are built with WooCommerce blocks by default, My Account uses the [woocommerce_my_account] shortcode, and the Shop page needs no content. Assign them under WooCommerce > Settings > Advanced.
- Cart, Checkout and My Account must be three separate pages. The documentation warns that using one page for all three causes incorrect redirects and can break payment gateways.
- If a page goes missing, restore it with WooCommerce > Status > Tools > Create pages.
Account and guest checkout settings
WooCommerce > Settings > Accounts & Privacy controls guest checkout, account creation, how personal data is retained or removed, and privacy notices. Our advice, based on how friction works rather than on any test: let customers check out as guests unless you sell something that needs an account, such as downloads or subscriptions, and offer account creation after the order. Fewer required fields means fewer reasons to leave. The checkout optimisation guide goes into specific field choices.
Cart and Checkout blocks versus shortcodes
New stores use the block-based Cart and Checkout. If you use an extension that has not been updated for blocks, it might not appear at checkout, and you should check the extension’s documentation for compatibility. Do not switch your live checkout without testing a full order afterwards.
Coupons
If you enabled coupons, create them under Marketing > Coupons. Keep a short list: a welcome code, a free shipping code if you use one, and anything seasonal. Each coupon should have an expiry date and usage limits so that a leaked code cannot run forever. For seasonal peaks, our Black Friday preparation plan has a timeline. For recovering abandoned baskets, see abandoned cart emails.
Check that it worked
- The cart page shows the product, quantity controls and a button to proceed to checkout.
- Checkout asks only for fields you need.
- Guest checkout behaves as you set it.
Order emails that actually arrive
Customers judge a store by its emails: the order confirmation, the shipping notice, the password reset. Go to WooCommerce > Settings > Emails, select an email template and make sure Enable this email notification is ticked. The From name and From address are set on the same Emails screen.
Set the sender properly
WooCommerce documentation advises using a From address on your own domain rather than a public one such as Gmail or Yahoo, because sending your domain’s mail from a server that is not authorised for it makes messages more likely to be filtered or blocked. Three problems cause most missing-email reports:
- Mismatch. The From address uses a public domain while your web server sends the message.
- No authentication. The domain lacks SPF, DKIM and DMARC records. Your email or SMTP provider documents the exact DNS records to add.
- Not sent at all. The email never left your site or failed to send. Logs tell you which.
The documentation recommends a dedicated SMTP or transactional email service over relying on your hosting server’s mail function, and notes an average store can usually stay within free usage tiers. Several of the email marketing providers in our Mailchimp alternatives roundup also offer transactional sending, and FluentCRM handles marketing email, though it is a separate job from order emails.
Check your email logs
To test, create a test order or trigger the email, then open WooCommerce > Status > Logs and filter for the transactional-emails source. Each entry is marked Sent, Failed, Disabled or Skipped. If entries are missing, check WooCommerce > Status > Logs > Settings to confirm logging is on. Remember that WordPress’s own password reset and admin emails are separate and do not appear in WooCommerce’s transactional email log.
Make the emails look like your brand
In the Emails settings, you can add your name and branding to the template, such as a header image, footer text and colours, if your version of WooCommerce offers those fields. Keep the footer clean: business name, support address and a pointer to returns information. Send yourself a test order and read it on a phone, because most customers will.
| Who gets it | Decision for you | |
|---|---|---|
| New order | You or your team | Which mailbox receives it, and does a second person need a copy |
| Processing order | Customer | Does the wording set the right delivery expectation |
| Completed order | Customer | Mention tracking, returns and how to reach support |
| Low stock | Store manager | Is the threshold sensible, and does someone read the inbox |
The exact list of emails in your install may be longer than this table. Open the Emails screen and review every one that is enabled, rather than assuming.
Check that it worked
- A test order produces both the customer email and the admin email in real inboxes, not only in logs.
- Neither lands in spam. If one does, fix authentication before launch.
Legal pages and customer trust
A store collects personal data, takes money and makes promises. Customers and regulators expect clear policies. This is another area where you should confirm requirements for your country with a professional, because the rules differ by place and product.
Terms, refund policy and privacy
- Terms and conditions. Optional in WooCommerce but recommended, per the documentation. Once you assign a page under WooCommerce > Settings > Advanced, a link to it appears at checkout and customers agree to it by continuing.
- Refund and returns policy. The wizard creates a draft. Publish it first, then select it in the page setup. The documentation notes that once it is public, WooCommerce adds structured data for search engines, but it does not add a navigation link, so add one to your menu or footer yourself.
- Privacy policy. WordPress has its own privacy policy page setting. WooCommerce also lets you set privacy notices under Accounts & Privacy. List the payment processor, shipping carriers, email provider and analytics tools you use, since each handles customer data.
- Shipping policy. Countries served, delivery times, costs, who pays duties, what happens to lost parcels.
- Cookie notice. If your analytics or marketing tools set cookies and your audience is in a region with consent rules, you need a consent mechanism.
Do not copy another store’s policies word for word. They describe their business, not yours, and may not match your law. Use a lawyer-reviewed template or a professional, then edit it to match what you really do.
Trust signals that cost nothing
- A real address and a working contact method in the footer.
- Prices, shipping and returns terms visible before checkout.
- A secure checkout on HTTPS, which you have already confirmed.
- Honest product descriptions with real photographs.
Performance for a store
Shops are heavier than brochure sites. Cart and checkout pages cannot be fully cached, because they are personal to each visitor. That changes how you tune the site. The principles from our speed optimisation guide still apply, with store-specific cautions.
- Use a good host and current PHP. The server is the foundation. See hosting by use case.
- Cache pages, but exclude cart, checkout and account pages. Most caching plugins that support WooCommerce do this automatically; confirm it. The caching plugin comparison covers the main options.
- Add an object cache if your host offers one. Stores run many database queries. The Redis guide explains the idea.
- Compress and resize product images. Product galleries are usually the heaviest part of a page.
- Keep the plugin count down. Every extra plugin can load scripts on product, cart and checkout pages.
- Measure the pages that earn money. Test a product page and the checkout, not only the home page. See PageSpeed Insights for WordPress and Core Web Vitals.
- Clean up as you go. Orders, sessions and transients accumulate. See how to clean the database safely.
The dedicated WooCommerce speed checklist goes deeper. A final warning: after any caching or optimisation change, place a test order. Over-aggressive caching and script delaying are classic causes of a checkout that silently stops working.
Security for a store that takes money
A store has two additional exposures compared with a brochure site: customer accounts and payment flows. Your payment provider handles card data, which is the main reason to use a hosted or tokenised gateway rather than anything that touches raw card numbers. Your job is to protect the admin, the accounts and the site itself.
- Update promptly. The Stripe extension documentation currently opens with a security notice telling store owners to update to a patched version. That is typical: payment plugins are high-value targets. Keep WordPress, WooCommerce, the gateway and every extension current.
- Enforce two-factor authentication for admins and shop managers. See the two-factor authentication guide.
- Give people the least access they need. A fulfilment assistant does not need to be an administrator. See user roles and least privilege.
- Use a security plugin or host-level protection, and review the security plugin comparison and the full security guide.
- Stop fake registrations and spam orders. See our spam guide.
- Back up before updates, and back up the database often, because orders live in it. See backup plugins and revisit the backup routine.
- Plan for the worst. If the site is compromised, the steps in hacked site recovery apply, and you should contact your payment provider.
Where the WooCommerce settings let you protect data, use them. Under Accounts & Privacy you can control how personal data is retained or removed, so you do not keep what you do not need.
Test orders: the step that finds the expensive mistakes
Do not launch on faith. A proper test run exercises the whole chain: product, cart, shipping, tax, payment, email and stock. Keep your gateway in test mode and your store in Coming soon mode while you do this.
Use Coming soon mode as your private preview
Under WooCommerce > Settings > Site visibility you can choose Coming soon or Live. In Coming soon mode, only authorised users and people with a private link can view the store. You can generate a private link to share with a reviewer. An Apply to store pages only option protects just the store pages (cart, checkout, terms, shop, product and category or tag pages) and leaves the rest of the site open, which suits a store added to an existing site.
The test matrix
| Test | What to do | Pass when |
|---|---|---|
| Happy path | Buy one in-stock product with a test card | Order appears in WooCommerce > Orders with the right status |
| Declined card | Use a decline test number | Clear error, no paid order |
| 3D Secure | Use a 3D Secure test card | Authentication step completes, then the order is paid |
| Variation | Buy a specific size or colour | The order shows the chosen variation and stock drops for that variation |
| Shipping zones | Checkout from an address in each zone and one in none | The right methods and prices, or the intended message |
| Shipping classes | Mix a heavy and a light product | Total matches your per-class maths |
| Tax | Check addresses in taxed and untaxed regions | Tax line matches your settings |
| Coupon | Apply a valid and an expired code | Valid reduces the total, expired is refused |
| Free shipping threshold | Cart just below and just above | Free option appears only above |
| Emails | Complete an order and mark it completed | Customer and admin emails arrive, not in spam |
| Guest and account | Check out as a guest and as a logged-in customer | Both follow your settings |
| Mobile | Repeat on a phone | Forms and buttons are usable |
| Refund | Refund a test order from its edit screen | Status updates and the customer is notified, if enabled |
Read the order the way you will in real life
Open each test order in WooCommerce > Orders. Check the billing and shipping addresses, the items, the shipping line, the tax lines, the payment method and the status. Move it through the statuses you will use. If you ever feel lost about what a status means, the order edit screen and WooCommerce documentation list them. Then delete or mark your test orders so they do not pollute your first real reports.
Then test the live gateway once
Test mode proves the plumbing. Only a real payment proves the live account is correctly connected. Many store owners switch off test mode, buy a low-priced product with their own card, check the money arrives in the provider dashboard, then refund it. Confirm the provider’s refund and fee behaviour first so the small cost is no surprise.
The launch checklist
Work through this list in order. Tick each item only when you have seen it work, not when you believe it works.
Foundation
- HTTPS works on every page with no mixed content warnings.
- WordPress, WooCommerce, the theme and all plugins are updated.
- A full backup exists and a restore has been tested somewhere safe.
- PHP version and memory meet the requirements you checked at the start.
Store settings
- Store address, selling countries, shipping countries and currency are right.
- Units for weight and dimensions are set.
- Cart, Checkout and My Account are three separate, correctly assigned pages.
- The Shop page is assigned and the
/shop/URL loads.
Catalogue
- Every product has a clear title, original description, photos, price, category and correct tax status.
- Variable products have complete variations with prices and stock.
- Stock levels and the low stock threshold are set.
- Shipping weight, dimensions and classes are entered.
Money
- The live gateway is connected and test mode is off.
- Webhooks, if your gateway needs them, are set up and working.
- Tax rates or automated taxes are configured and tested, after confirming your obligations with a professional.
- One real, low-value order has been placed and refunded.
Delivery
- Every zone has at least one method; unsupported regions behave as intended.
- Free shipping rules are correct and the margin works.
- Delivery times and returns terms are stated on the site.
Communication and legal
- Order emails arrive in real inboxes from your own domain, with email authentication in place.
- Terms, refund and returns, privacy and shipping policies are published, linked in the footer and, where relevant, assigned in WooCommerce.
- A cookie or consent mechanism is in place if your audience needs it.
Search and analytics
- Product and category pages have unique titles and meta descriptions. The title tag tutorial explains how to write them.
- The XML sitemap is live and submitted. See the sitemap guide and Google Search Console for WordPress.
- Run through the SEO launch checklist.
Go live
- Go to WooCommerce > Settings > Site visibility and switch from Coming soon to Live, then save.
- Open the site in a private window and from a mobile device to confirm the landing page is gone. If you still see it, check the setting saved and clear any server or CDN cache, as the documentation suggests.
- Place a final live test order.
- Watch the first real orders closely, and check email and the payment dashboard the same day.
Alternatives to WooCommerce, briefly
WooCommerce is the default choice for WordPress stores, but it is not the only one. If you want something lighter or a different model, there are options. This section is intentionally short, because a full comparison belongs in its own article. See WooCommerce alternatives and the WordPress ecommerce guide.
| Option | Shape | Worth considering when |
|---|---|---|
| WooCommerce | Self-hosted plugin with a very large extension ecosystem | You want maximum flexibility and control and accept managing updates, extensions and hosting |
| FluentCart | A WordPress ecommerce plugin from the Fluent family | You want a newer, more focused plugin. See the FluentCart setup guide |
| SureCart | A WordPress plugin built around a cloud-based checkout | You want hosted checkout handling. See the SureCart guide |
For a side-by-side, read the detailed WooCommerce, FluentCart and SureCart comparison. Judge any option by the same questions you used above: payments in your country, tax handling, shipping flexibility, extension quality, and what migration would cost if you outgrow it. Features, pricing and architectures change, so verify each vendor’s current documentation.
Common mistakes and troubleshooting
Use this table as a symptom-first guide. In each case, change one thing at a time and retest.
| Symptom | Likely cause | Fix |
|---|---|---|
/shop/ returns a 404 | The Shop page slug is not shop | Rename the slug, or add a redirect, as the documentation suggests |
| Cart or Checkout page missing or blank | A page was deleted or unassigned | Use WooCommerce > Status > Tools > Create pages, then check Settings > Advanced |
| Redirect loops or broken payments | Cart, Checkout and My Account share one page | Give each its own page |
| Customer sees "no shipping available" | Their address falls in a zone without methods, or in no zone and Rest of the world has none | Add a method to the zone or to Rest of the world, or confirm the exclusion is deliberate |
| Wrong shipping zone applies | A broader zone sits above a narrower one | Reorder zones from smallest to largest and save |
| A country does not appear in zone regions | Not allowed in Shipping location(s) | Add it in WooCommerce > Settings > General |
| Tax settings greyed out | Automated taxes are enabled | Switch to Disable automated taxes if you want manual rates |
| No tax at checkout | Taxes not enabled, product tax status is None, or no rate matches the address | Check the General setting, the product’s tax status and the rate table |
| Totals off by a cent | Rounding setting | Review Round tax at subtotal level, instead of rounding per line |
| Variation cannot be bought | No price on that variation | Add a price or use bulk actions |
| Attribute missing from Variations | Not marked for variations | Tick Used for variations and save attributes |
| Order stuck in the wrong status after payment | Webhook missing or failing | Check the gateway’s webhook setup and logs |
| Cards declined in Europe | Integration not SCA-ready or 3D Secure issue | Update the gateway; test with 3D Secure cards; ask the provider |
| Emails missing | Template disabled, sending failed or domain not authenticated | Check WooCommerce > Status > Logs (transactional-emails), then SMTP and DNS authentication |
| Visitors still see Coming soon after launch | Setting not saved or a cache holds the old page | Resave, test in a private window, clear server and CDN caches |
| Checkout broke after an update or optimisation | Plugin conflict or over-aggressive caching or script delay | Follow the plugin conflict guide and exclude checkout from optimisation |
Recap checklist
- Back up, check requirements, and ideally configure on staging.
- Install WooCommerce, run the wizard and skip features you do not need.
- Set store address, selling and shipping countries, and currency.
- Build products with original descriptions, correct tax status, and shipping data.
- Set a stock policy and enter quantities and thresholds.
- Connect one payment gateway, test it with test cards including 3D Secure, then confirm SCA readiness with your provider.
- Build shipping zones from smallest to largest, add methods, and use classes where products ship differently.
- Decide prices inclusive or exclusive, set tax options and rates, and confirm with a professional.
- Assign Cart, Checkout and My Account, and set guest checkout.
- Configure order emails with a domain sender and authentication.
- Publish policies and link them.
- Tune performance and secure the admin.
- Run the test matrix in Coming soon mode, then switch to Live and place one real order.
What to do next
A configured store is the start. Your next jobs are traffic and trust.
- Get your pages found. Write search-friendly titles with the title tags tutorial, and read the WordPress SEO guide.
- Make the site fast, following the speed-up tutorial.
- Improve conversions through product page work and checkout optimisation.
- Build a maintenance habit with the maintenance checklist and take care with automatic updates.
- Learn the editor your content team will use in the block editor tutorial.
- If you use AI tools to help run the store, read AI and WooCommerce store management and the risks in AI agent security risks.
FAQ
Is WooCommerce free?
The core plugin is free to install from the WordPress plugin directory. You still pay for hosting, a domain, any paid extensions you choose, and payment processing fees charged by your provider. Check each provider’s pricing page for current fees.
Do I need to run the setup wizard?
No. You can choose Skip guided setup on the first screen and go straight to the checklist. You can reopen the wizard later from the Help menu on supported admin pages such as WooCommerce Status. The wizard saves time, but every setting it collects can be changed in the settings.
How many products should I launch with?
Launch with the products you can describe well, photograph properly and fulfil reliably. A small, polished catalogue beats a large one with thin descriptions. You can add more once the process works.
Should prices include tax?
That depends on your market and your obligations, and you should ask a tax professional. WooCommerce supports both: Prices entered with tax tells it how you type prices, and the display settings control whether shoppers see prices with or without tax. Decide before entering products.
What is a shipping class and do I need one?
A shipping class groups similar products, such as bulky items, so a method like Flat Rate can charge different amounts. They only matter if your costs differ by product type. If everything ships at one price, skip them.
Why can I not select a country in a shipping zone?
Zone regions are limited by your Shipping location(s) setting in WooCommerce > Settings > General. Add the country there, save, then return to the zone.
What is SCA and does it apply to me?
Strong Customer Authentication is a European requirement for card payments, in effect from 14 September 2019 under PSD2. Stripe says it affects businesses based in the EEA that serve EEA customers and accept cards, and that card payments use 3D Secure to meet it. Use a current gateway, test 3D Secure, and ask your provider whether your setup is ready.
How do I test payments without spending money?
Turn on your gateway’s test mode and use the provider’s published test cards, for example Stripe’s 4242 4242 4242 4242 for a successful Visa payment. Use any future expiry date and a three-digit CVC. Never use test numbers on a live gateway or real card details in test mode.
Why are my order emails going to spam?
The common causes are a From address on a public domain such as Gmail, a domain without email authentication, or sending through the web server’s basic mail function. Use an address on your domain, set up authentication records, and consider a dedicated SMTP or transactional email service.
Can I hide the store while I build it?
Yes. New stores start in Coming soon mode. Under WooCommerce > Settings > Site visibility you can keep it, generate a private link for reviewers, or limit the restriction to store pages only.
Will caching break my checkout?
It can, if cart, checkout and account pages are cached. Use a caching plugin that handles WooCommerce, confirm those pages are excluded, and always place a test order after changing optimisation settings.
What do I do if a default page is missing?
Go to WooCommerce > Status > Tools and use Create pages. Then check WooCommerce > Settings > Advanced to confirm Cart, Checkout and My Account are each assigned to their own page.
Is WooCommerce right for me, or should I use something else?
If you want flexibility, a large extension ecosystem and control of your own site, WooCommerce is a sensible default. If you prefer a lighter or hosted-checkout approach, look at FluentCart or SureCart, and compare them using current vendor documentation. Our detailed comparison is a starting point.
Do I have to charge tax?
That is a legal question that depends on where you and your customers are, and what you sell. WooCommerce’s documentation covers only how to configure the software. Speak to a tax professional before choosing your settings.
Let your AI assistant do this for you
Open the ready prompt with step‑by‑step instructions for running it through NibWP.